
Installation Guide for SafetyCam Plus - Square Auxiliary Camera for OEM
Installation Overview:
- Confirm the Main Camera Setup: Ensure the SafetyCam Plus is associated with a vehicle, properly installed, and functioning correctly.
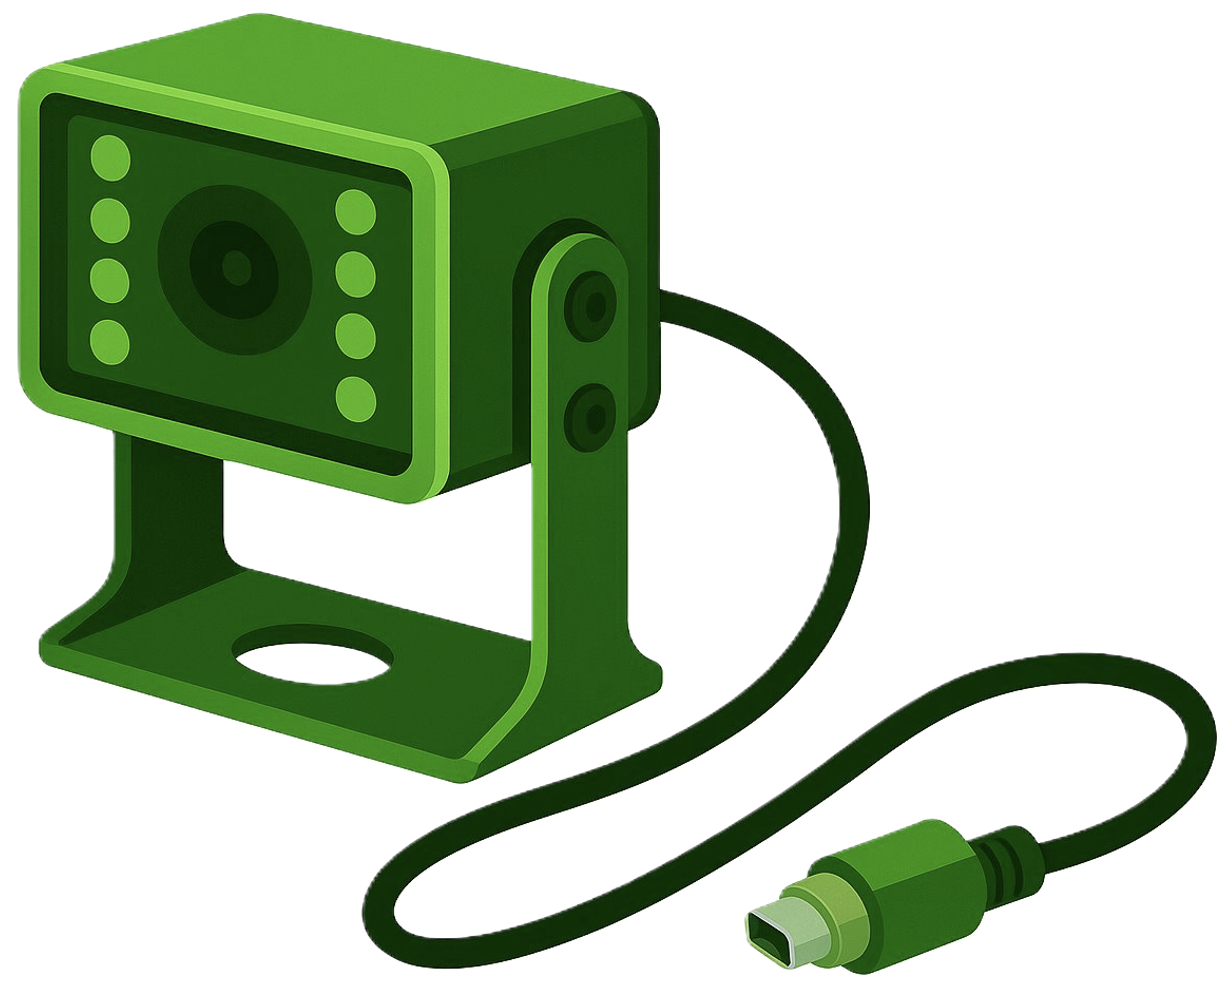
- Connect and Test the Wired Exterior Square Auxiliary Camera: Ensure the square Auxiliary Camera is properly connected to the main camera. Test it thoroughly to confirm it is functioning correctly before proceeding with the installation.
- Adjust Viewing Angles: Utilize the Live Streaming feature to set optimal viewing angles.
- Mount Your Square Auxiliary Camera: Ensure the square Auxiliary Camera is mounted securely to prevent any movement. Verify that it is stable and properly positioned to capture the desired view.
- Confirm Successful Installation: Press the emergency button to trigger a “Button Pressed” event and confirm proper camera installation.
Installation Steps:
The SafetyCam Plus supports the installation of a single wired interior rear or wired exterior square Auxiliary Camera, offering comprehensive coverage around your vehicle.
|
Note: Only one Auxiliary Camera can be connected to the SafetyCam Plus at a time. It can be either interior or exterior. |
Follow the steps below to ensure a smooth and secure installation:
Prerequisites for Installation:
- Turning Off the Vehicle: Ensure the vehicle is turned off before beginning the installation.
- Location Requirements: Place your vehicle in an area with good network connectivity. This will help facilitate the setup process and ensure the camera system can effectively communicate with your devices.
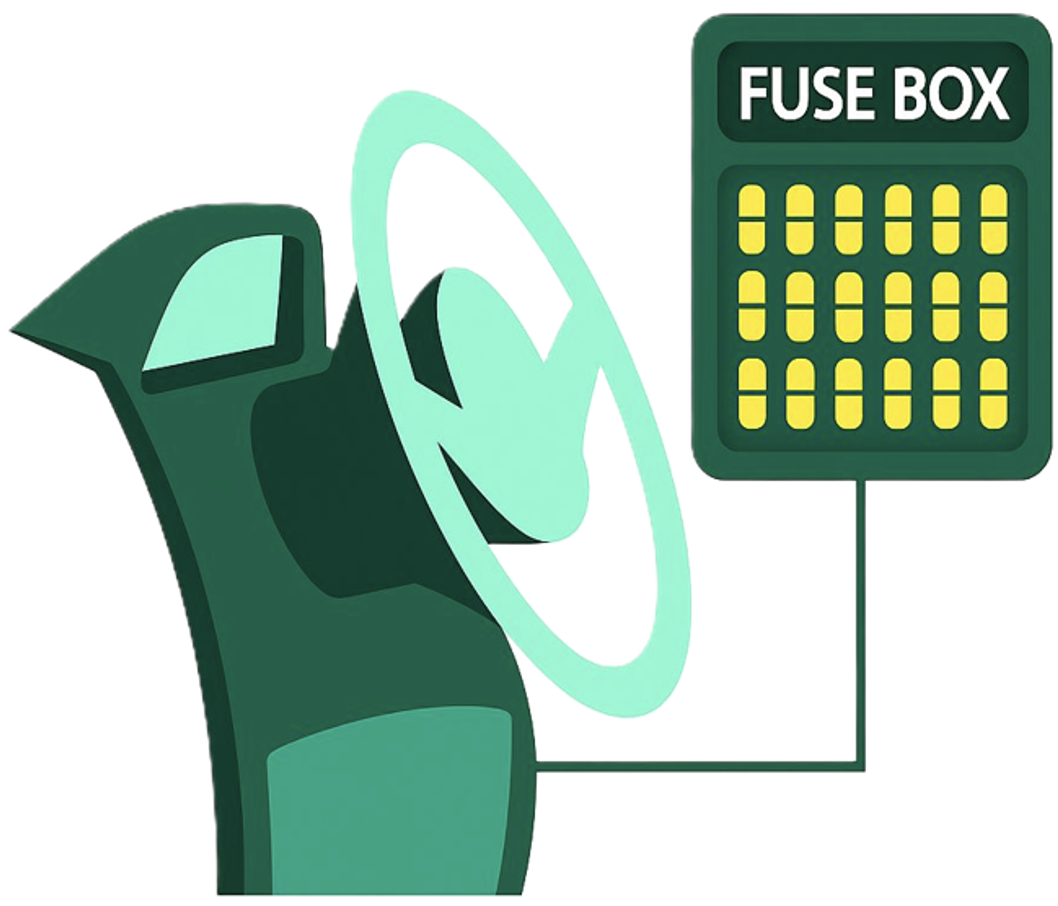
- Fuse-Box Identification: Locate the vehicle’s fuse box. It may be under the dashboard, near the glove box, or elsewhere depending on the model. Check the owner’s manual to find the exact location.
Step 1: Confirm the Main SafetyCam Setup:
Before connecting the wired exterior square Auxiliary Camera, ensure the following:
- The main SafetyCam is associated with a vehicle.
- The main SafetyCam is properly installed.
- The main SafetyCam is functioning correctly.
These steps are essential for seamless integration and optimal performance of the square Auxiliary Camera.
For detailed verification steps, go through the links below:
- SafetyCam Plus and SafetyCam Pro for OEM - Installation Guide
- SafetyCam - Vehicle Association - User Guide
Step 2: Connect and Test the Square Auxiliary Camera:
A. Connect the Square Auxiliary Camera to SafetyCam Plus:
- Connect the square Auxiliary Camera using the pre-fitted 16-foot (5-meter) cable included with the unit to establish a direct connection to the SafetyCam Plus.
|
IMPORTANT: Only one Auxiliary Camera can be connected to the SafetyCam Plus at a time. It can be either interior or exterior. In both cases, the cables are of fixed length and cannot be extended. |
- Route the cable properly for safe and secure installation. For an exterior square Auxiliary Camera, ensure the cable runs outside the vehicle.
- This step is crucial for enabling the square Auxiliary Camera’s functionality.
B. Ensure Secure Connections between Square Auxiliary Camera and SafetyCam Plus:
- Verify that the connection between the square Auxiliary Camera and SafetyCam Plus is firm and stable.
- A secure connection is essential for the system's reliability and performance.
C. Hardwire the SafetyCam Plus to the Vehicle’s Fuse Box:
The SafetyCam Plus power cable splits into three distinct wires, red, yellow, and black, on one end for hardwiring installations. Each wire serves a specific function to ensure proper power delivery and system operation:

-
Red (Constant Power) – 12V:
- Labeled B+ on the wire.
-
Connect to a constant 12V power source in the vehicle’s fuse box.
Yellow (Ignition Power) – 12V/0V: - Labeled ACC on the wire.
-
Connect to a switched power source that is active only when the ignition is on.
Black (Ground) – 0V: - Labeled GND on the wire.
- Connect to a grounded metal bolt on the vehicle’s chassis.
|
Note: Wire colors may vary by kit. Always verify labels or consult the instruction manual before making any connections. |
For detailed guidance on hardwiring, including diagrams, safety precautions, and step-by-step instructions, refer to the SafetyCam Plus & Pro for OEM - Installation Guide document.
D. Verify All Connections:
- Ensure all connections are secure.
- Confirm that the square Auxiliary Camera is securely connected to the SafetyCam Plus using the pre-fitted cable.
- Verify that the SafetyCam Plus and the square Auxiliary Camera are powered through hardwiring from the vehicle’s fuse box.
E. Tuck Away the Cables:
Once the camera powers on successfully:
- Neatly run the cable along the vehicle’s headliner (interior ceiling).
- Route the cable from the A-Pillar down to the fuse box.
| Note: Do not mount the square Auxiliary Camera until Step 4. |
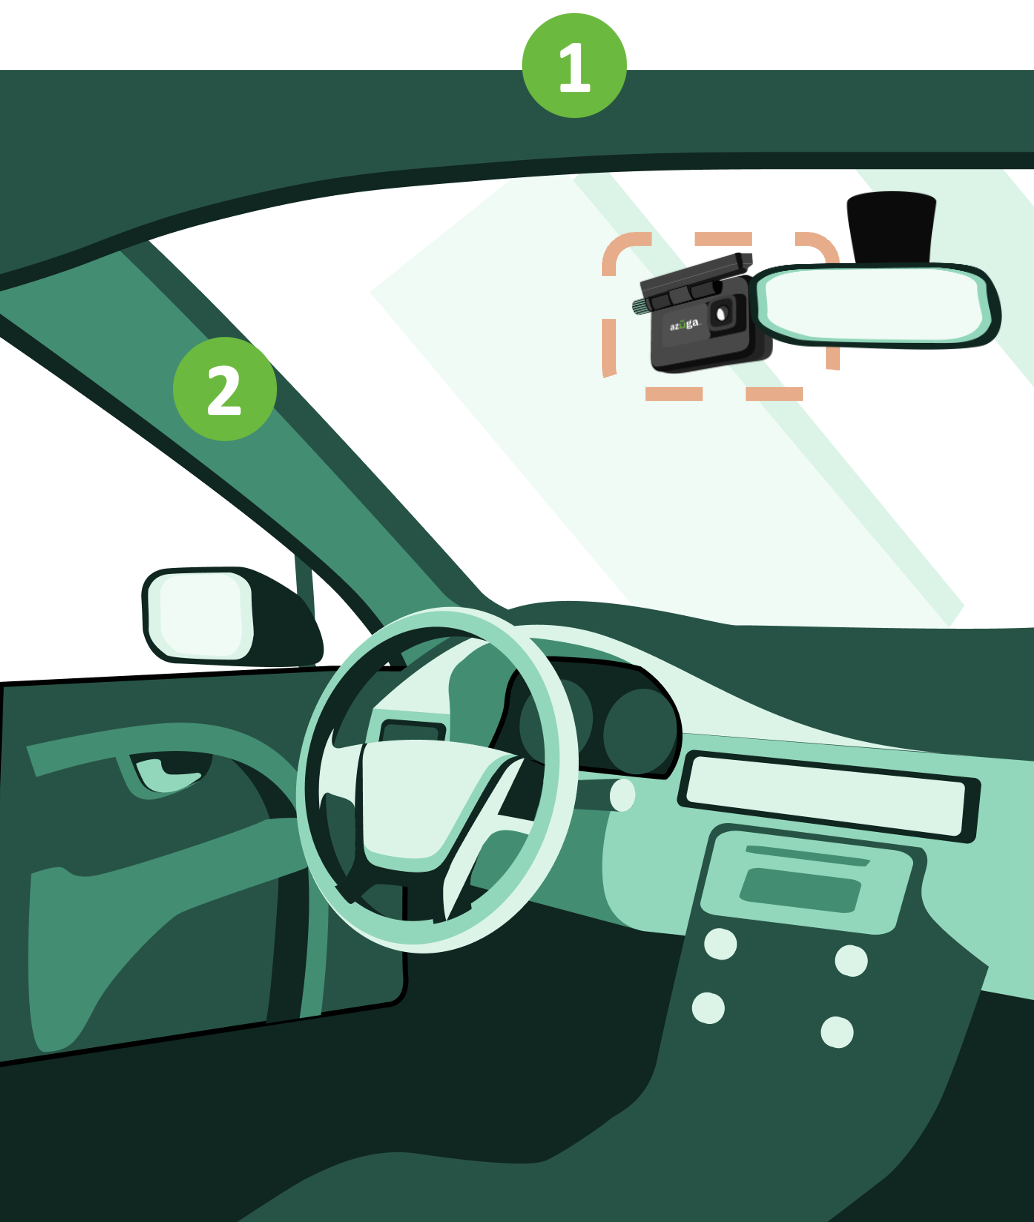
Step 3: Adjust the Square Auxiliary Camera Viewing Angles:
-
Ensure SafetyCam Association for Live Streaming:
- Before starting Live Streaming, make sure the main SafetyCam is properly associated with the vehicle. Without this association, the SafetyCam details will not appear on the Azuga platform (web or mobile), and Live Streaming for adjusting viewing angles will not be possible.
- Utilize the Azuga Fleet Mobile (AFM) App:
- The Azuga Fleet Mobile (AFM) app is highly recommended for adjusting the square Auxiliary Camera's viewing angles. Its user-friendly interface allows operators to quickly and effectively make the necessary adjustments while on the go.
- Live Streaming Feature:
- The Live Streaming feature is crucial for real-time monitoring and adjustments. Users can view the camera feed live, ensuring they can make precise angle alterations based on current conditions.
For detailed guidance on the association and viewing angle adjustments, refer to the resources below:
Step 4: Securely Mount the Square Auxiliary Camera:
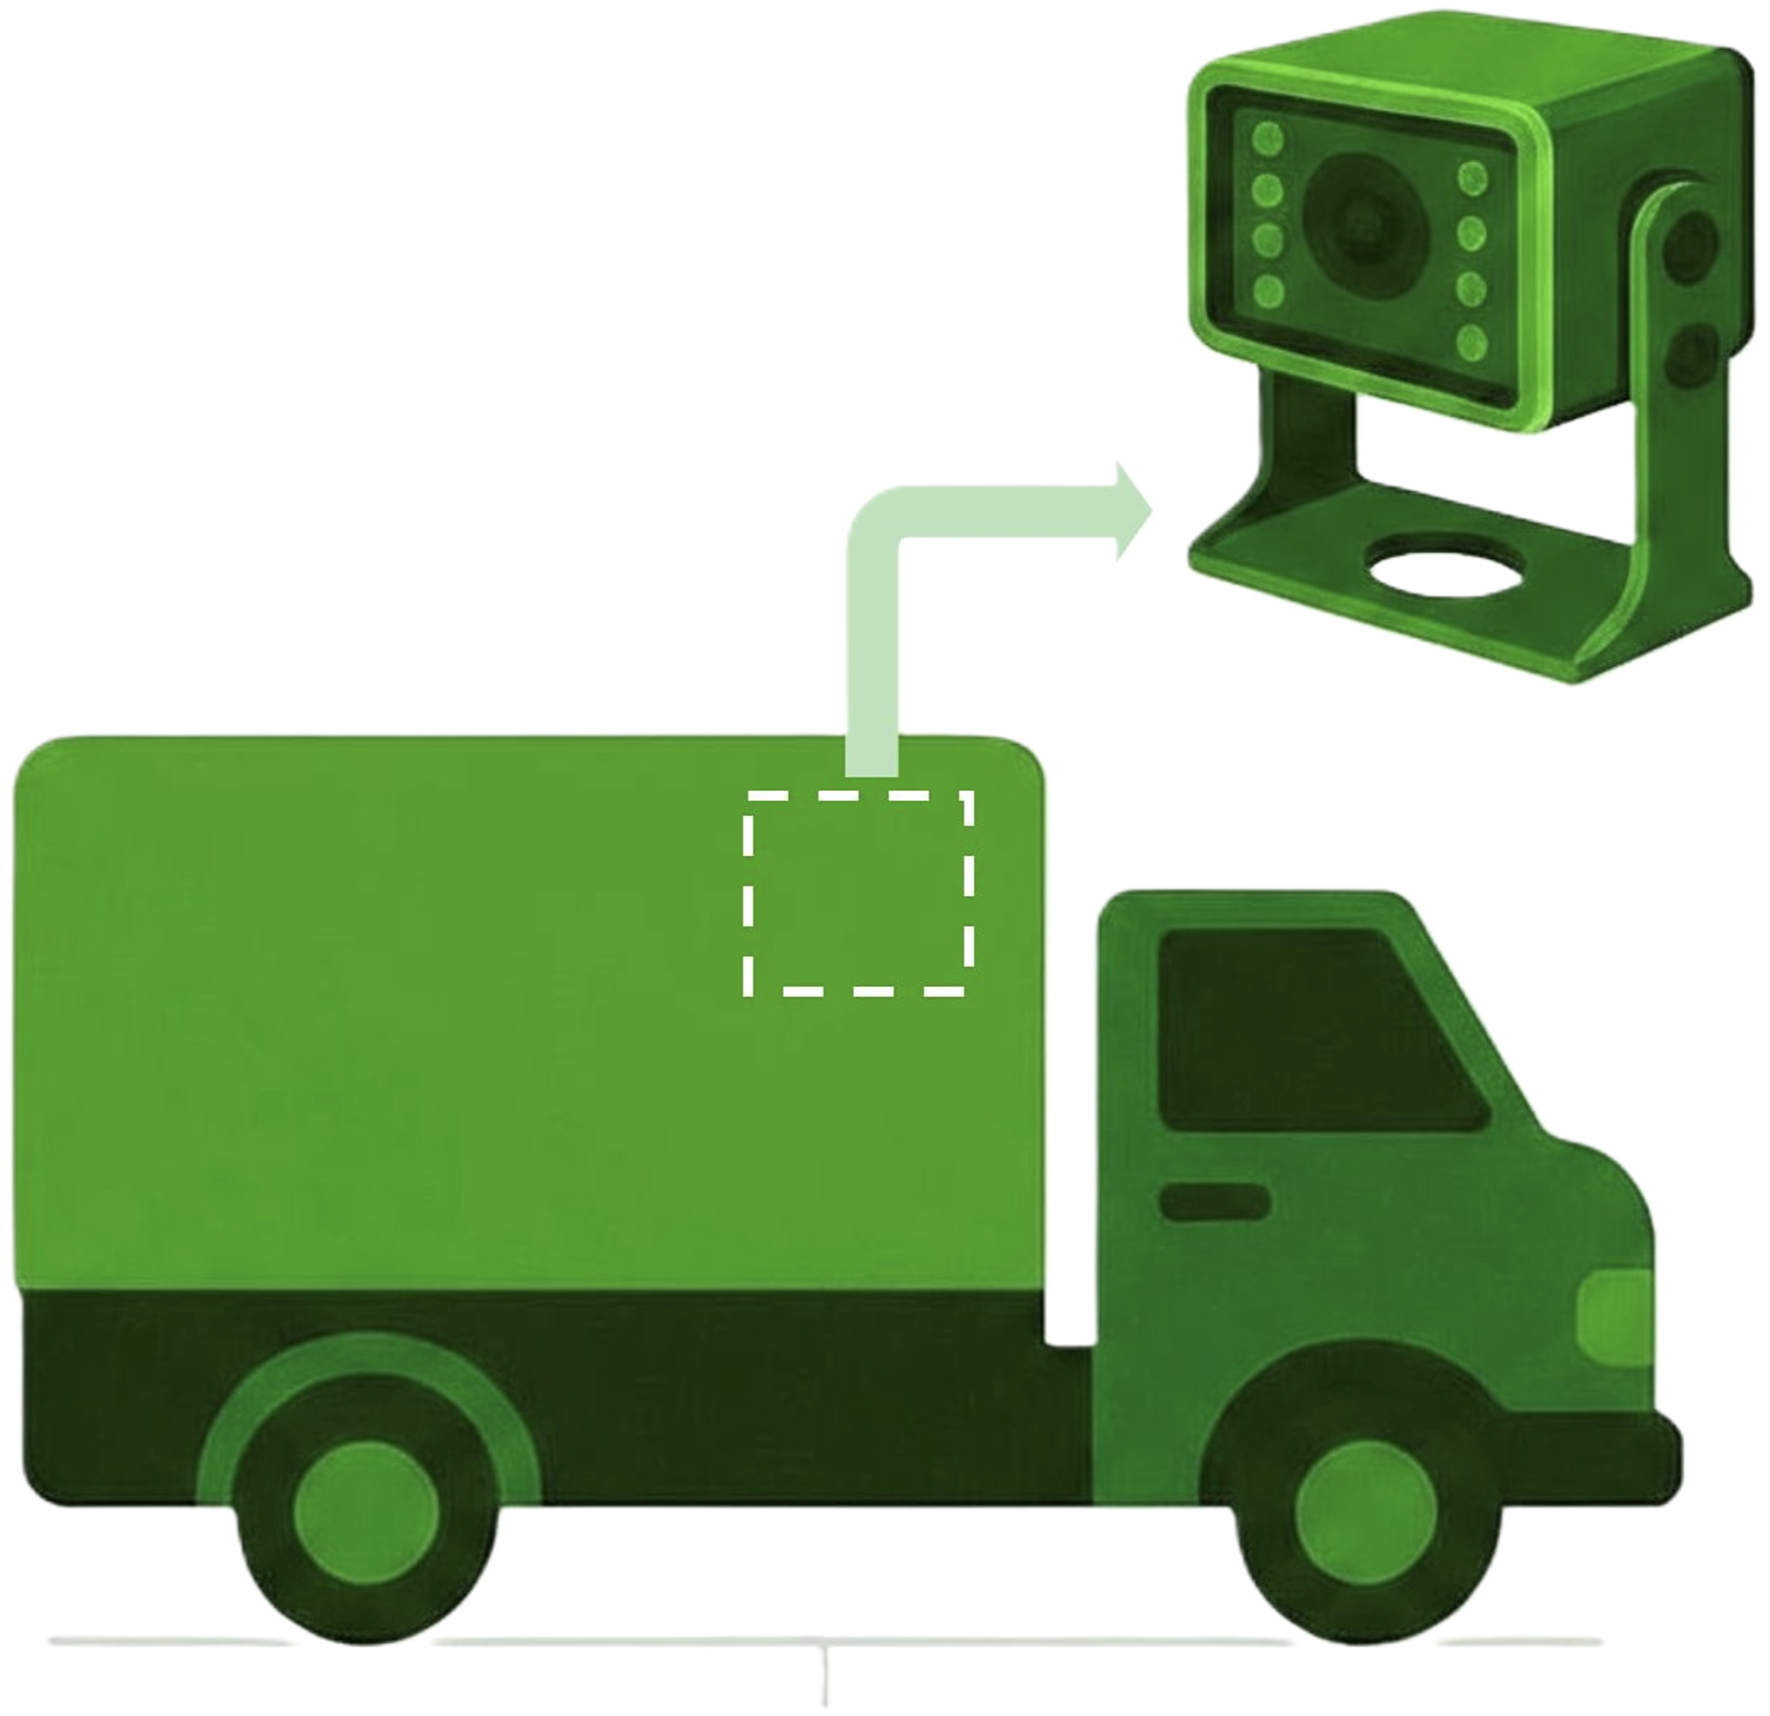
A. Choose the Mounting Location:
- Select an appropriate spot on the vehicle’s exterior that provides an optimal view for tracking and monitoring.
B. Attach and Secure the Mounting Bracket:
- Use the supplied bracket to mount the square Auxiliary Camera onto the vehicle’s exterior structure.
- Align the bracket properly and fasten it tightly to prevent movement during operation.
C. Verify Auxiliary Camera Stability:
- Ensure the square Auxiliary Camera is firmly attached and does not wobble. Test its stability by gently shaking the mounted structure.
|
Note: You can choose the screws and brackets that best fit your on-site installation needs. Different screw types, such as self-tapping screws, machine threads, or screw caps, can be used based on your vehicle and mounting requirements. |
Step 5: Confirm Successful Installation:
- Press the emergency button on the main camera after every installation. This action should trigger a "Button Pressed" event.
- This is a mandatory check to verify that the camera has been installed correctly and is functioning as expected.
- Within 10 minutes, the event video will be uploaded to the Azuga platform.
- This step is crucial to validate the main camera installation and ensure that events are being successfully uploaded to the system.
More Details:
Refer to the documents below to learn more about them:
- SafetyCam Plus - Square Auxiliary Camera for OBD-II - Installation Guide
- SafetyCam Plus - Rear Auxiliary Camera for OBD-II - Installation Guide
- SafetyCam Plus - Rear Auxiliary Camera for OEM - Installation Guide
- SafetyCam Plus and SafetyCam Pro for OBD-II - Installation Guide
- SafetyCam Plus and SafetyCam Pro for OEM - Installation Guide
PDF copy of the document: SafetyCam Plus - Square Auxiliary Camera for OEM - Installation Guide