
AFM v6.0 Updates
New Feature:
- The “Users” module has been introduced to AFM, accessible within the Dashboard >> Admin module. This empowers admins to efficiently manage user-related tasks, such as viewing, creating, editing, and deactivating users directly from AFM, aligning with the functionality available on the web.
Minor Improvement:
- The "Number of days" field has been renamed to "Service Center Duration" in AFM, accessible under the Dashboard >> Maintenance >> Service Entry module. This update enables users to specify the duration of time a vehicle spends at a service center in "dd", "hh", "mm" format for various services.
iOS Version Update:
- Exciting News: We've rolled out an updated version of the Azuga Mobile app with improved performance and exciting new features! As part of this update, we're discontinuing support for iOS 13 and earlier versions to optimize app functionality. To ensure you continue receiving the best experience, kindly upgrade to iOS 14 or later.
New Feature
The “Users” module has been introduced to AFM, accessible within the Dashboard >> Admin module. This empowers admins to efficiently manage user-related tasks, such as viewing, creating, editing, and deactivating users directly from AFM, aligning with the functionality available on the web
Previously exclusive to our web application, we have recently introduced the “Users” module to AFM. It can be found within the Dashboard/App home screen >> Admin >> Users tile.
This means users can create a new user using the same process as they would on the web. Additionally, they can view, edit any user information, and deactivate users directly on AFM, streamlining the process for increased efficiency.
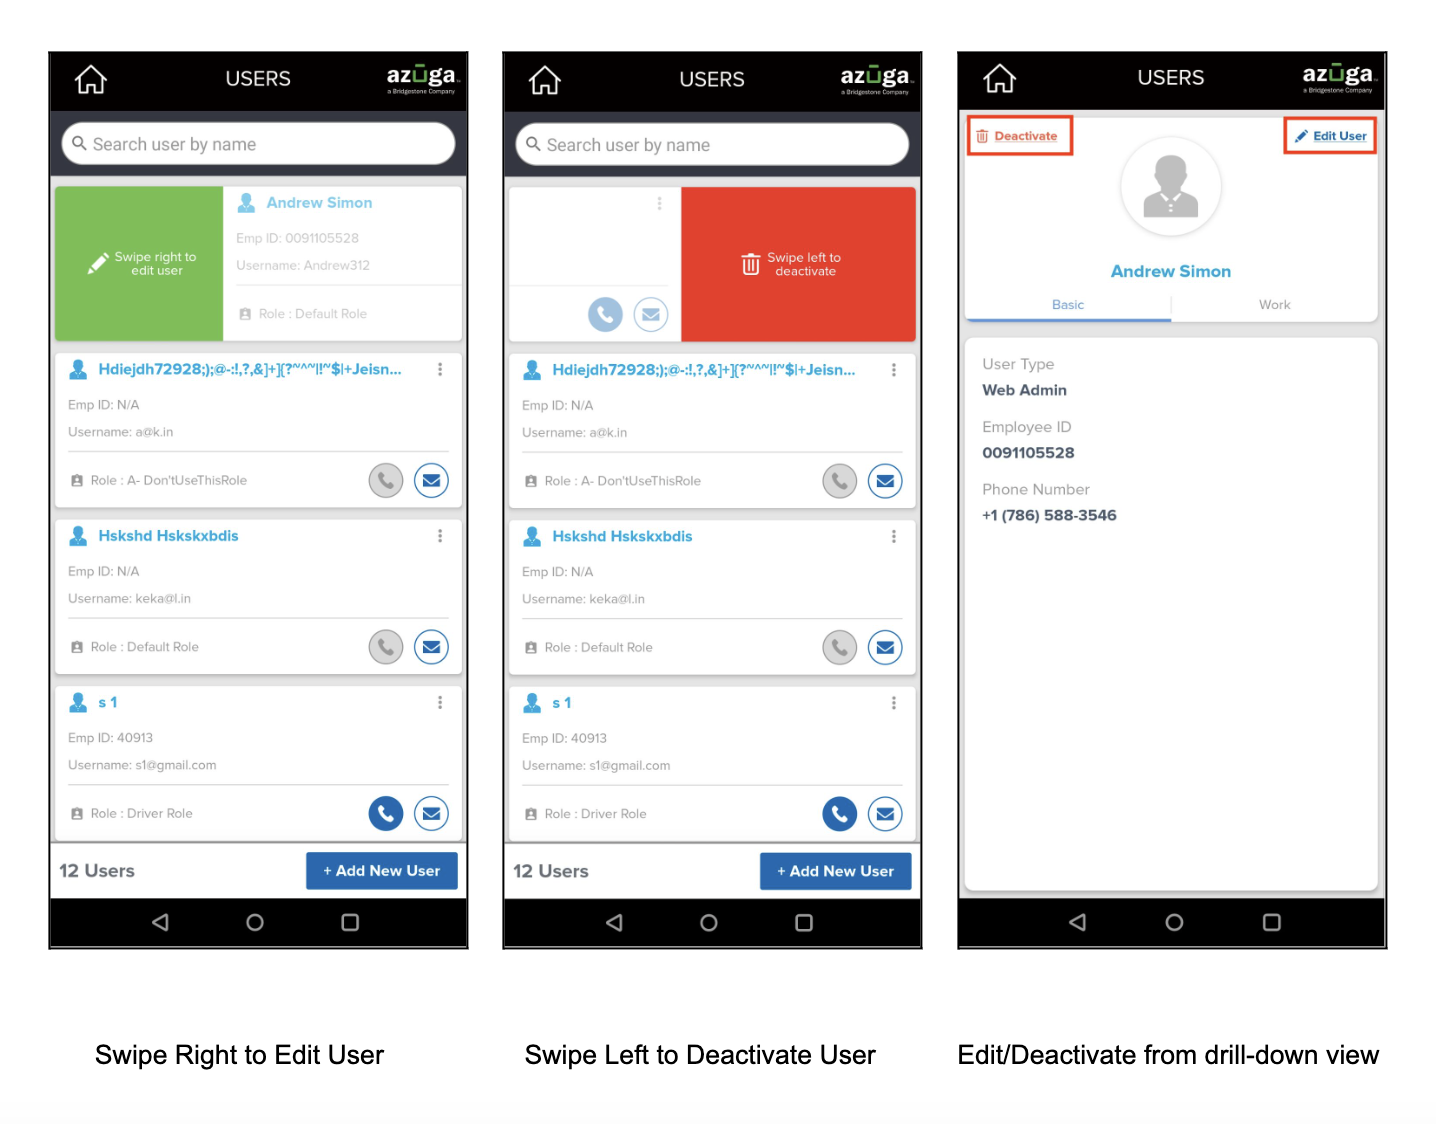
Editing or deactivating users in AFM can be done in three ways:
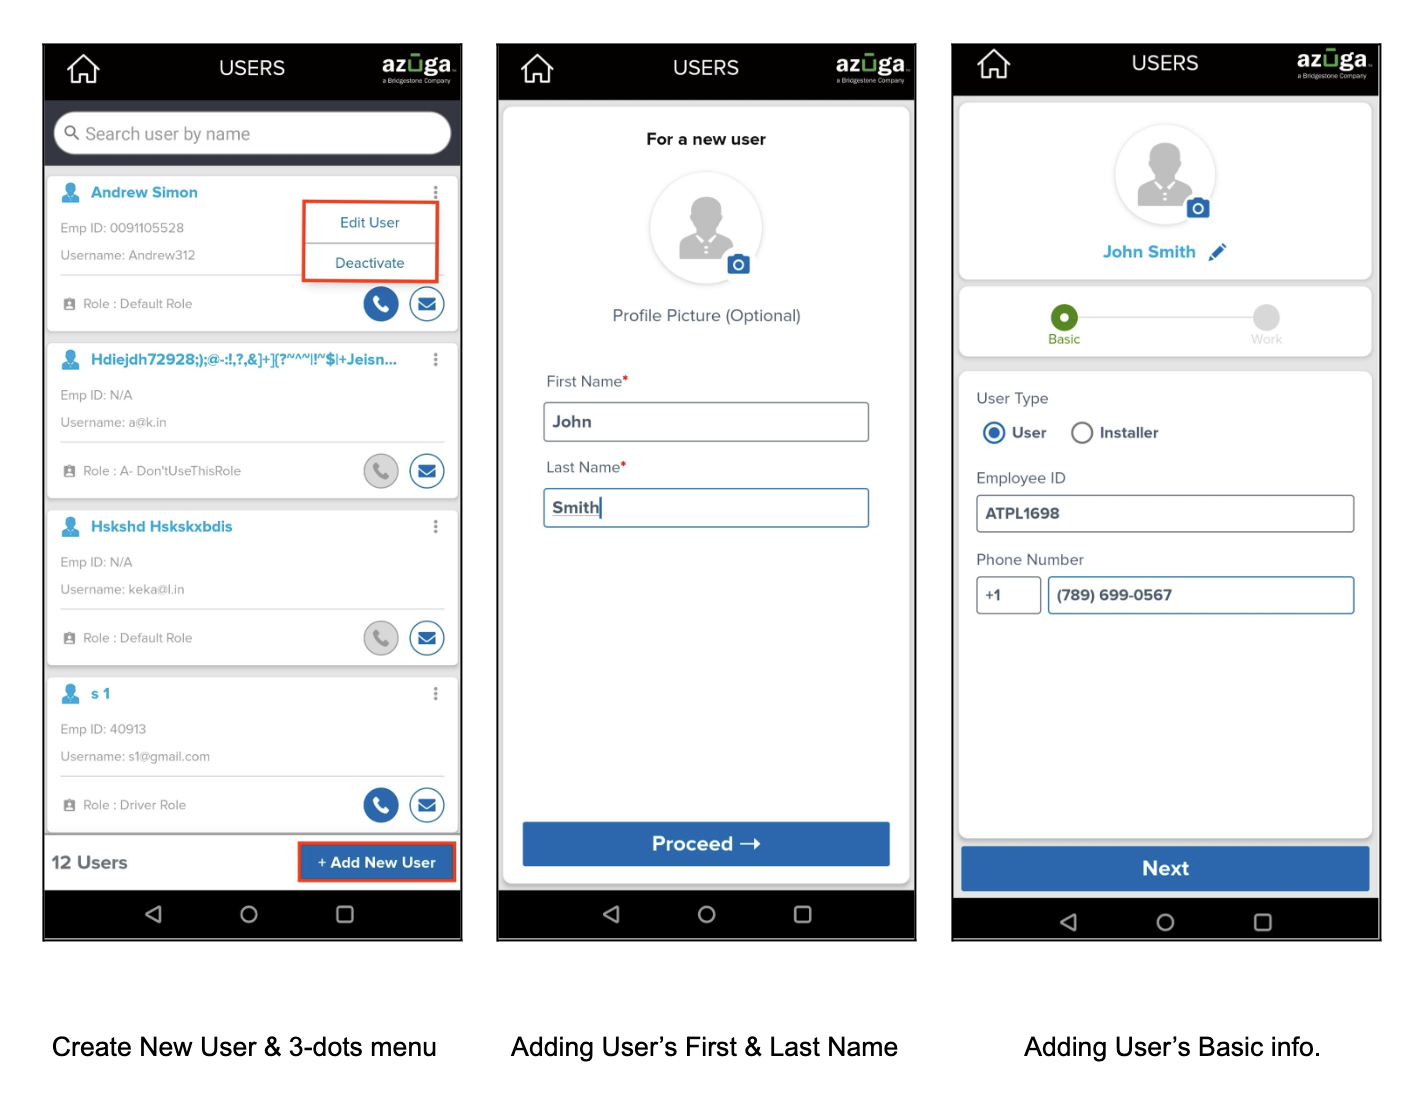
- Using the three-dot menu located on the user tile.
- Swiping left or right on individual user tiles to initiate the process.
- Accessing the drill-down view, where “Edit User” and “Deactivate” options are prominently positioned at the top of the screen.
Adding a new user in AFM can be done by clicking on “+Add New User” from the user list.
Following are the key considerations for managing user information on AFM:
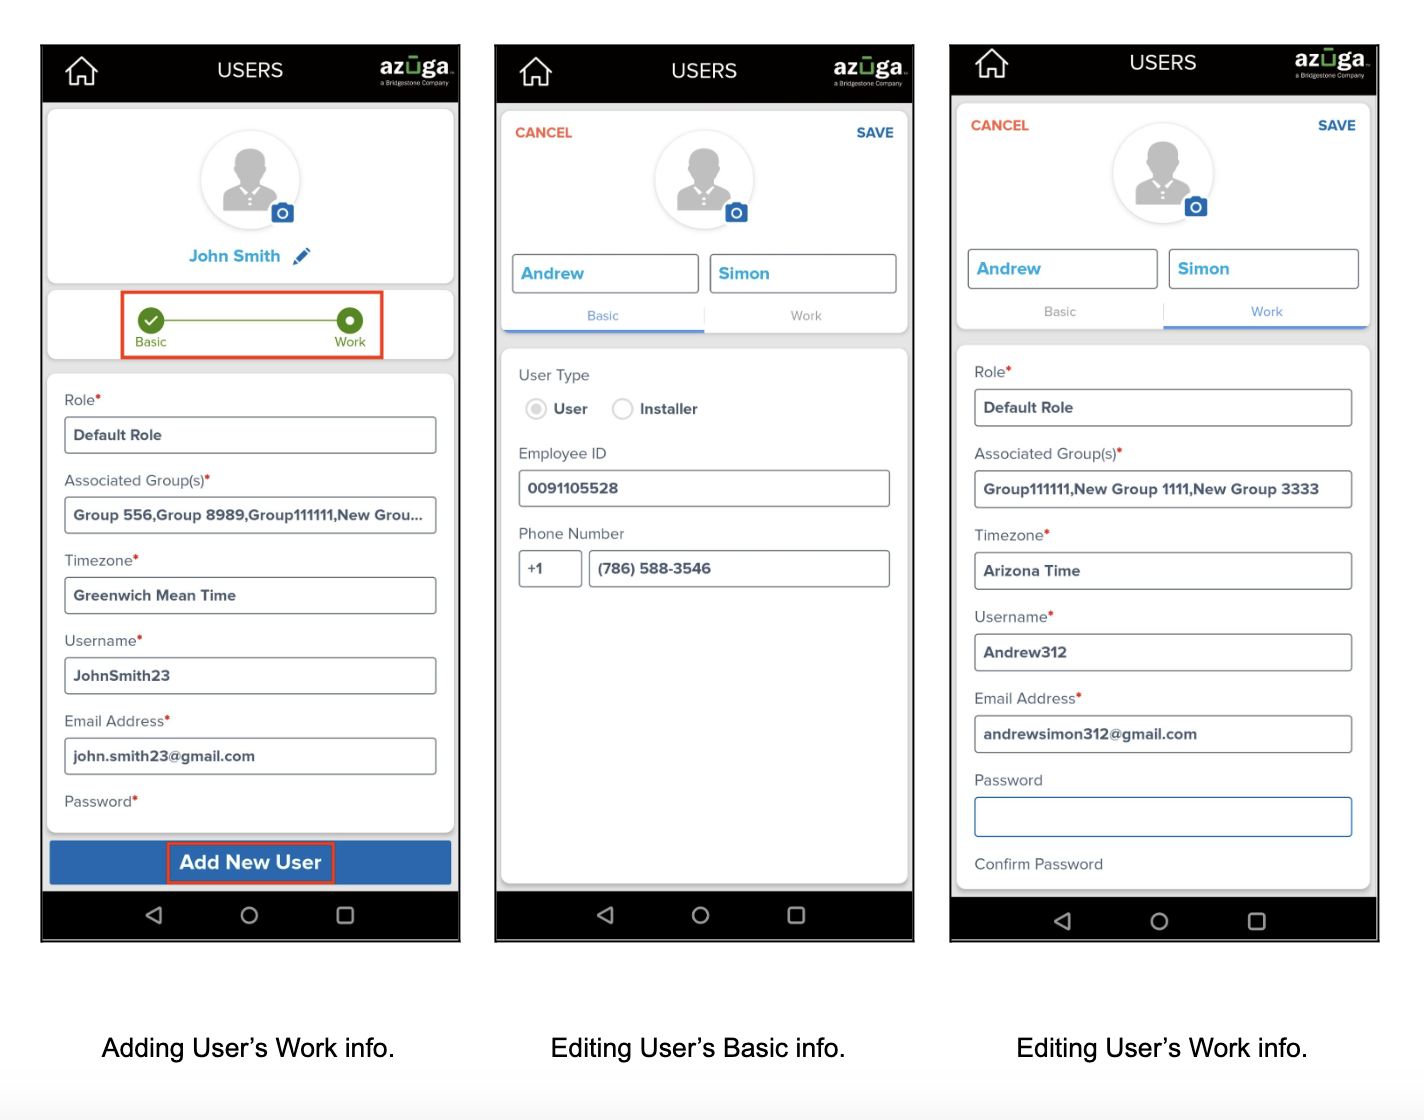
- User information is divided into “Basic” and “Work” categories.
- When editing or creating a new user, fields marked with a red star are mandatory. These fields must be completed to proceed with creating or saving the user's information successfully.
- Each required detail for these fields must adhere to the listed conditions. Failure to fulfill these requirements correctly will result in an error message from AFM, prompting you to correct the details accordingly.
- Enter all the required details to add/edit a user successfully.
|
Access Control:
|
Note: This new feature has been implemented on both Android and iOS.
Minor Improvement
The "Number of days" field has been renamed to "Service Center Duration" in AFM, accessible under the Dashboard >> Maintenance >> Service Entry module. This update enables users to specify the duration of time a vehicle spends at a service center in "dd", "hh", "mm" format for various services
We have renamed the "Number of days" field to the "Service Center Duration" in AFM. This change aligns with the field name already present in the web application.
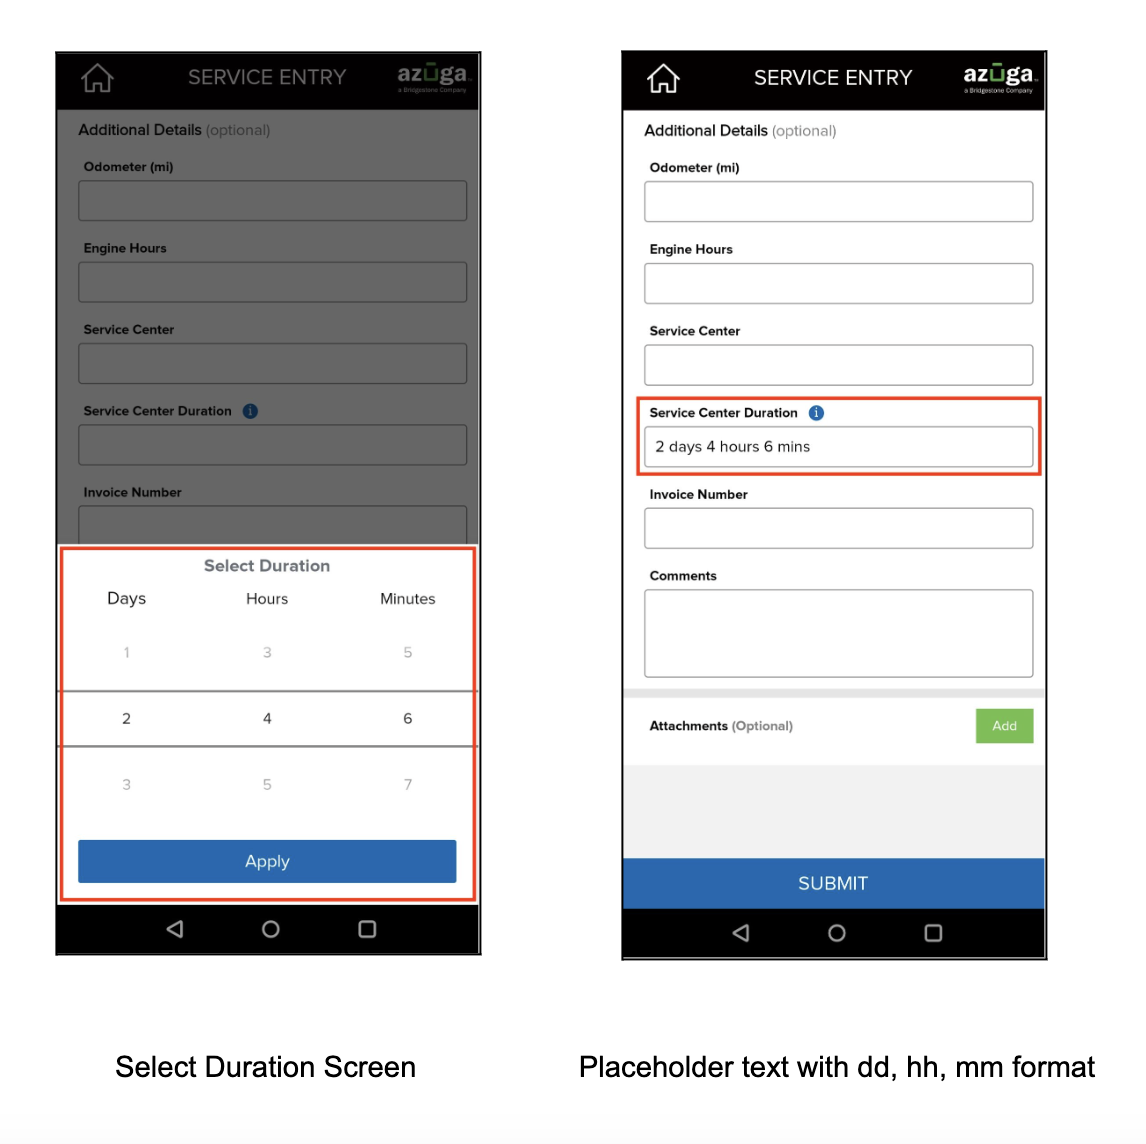
To access the “Service Center Duration” in AFM, navigate to the Dashboard/App home screen >> Maintenance >> Service Entry >> select a vehicle >> enter service details >> Additional Details (optional).
Clicking on the "Service Center Duration" will open a "Select Duration" screen with "Days", "Hours", and "Minutes" fields. Select your desired values for each field and click "Apply." The placeholder text will display in the format of "dd", "hh", and "mm", respectively.
Note: This feature enhancement has been implemented on both Android and iOS.
Link to the Release Notes: https://drive.google.com/file/d/1g7NEnDYEKS6AMh1dewrzonLvnuHFEeAu/view?usp=sharing