
How to Bulk upload Geofence data?
For a video explanation of the Geofences section, please refer to the following link:
Steps to Bulk Add/Edit/Delete data:
- Login to Azuga Fleet 2.0
- Go to the Admin module and click on the “Import” button.

3. Select Which Section/Page you want to import data for.

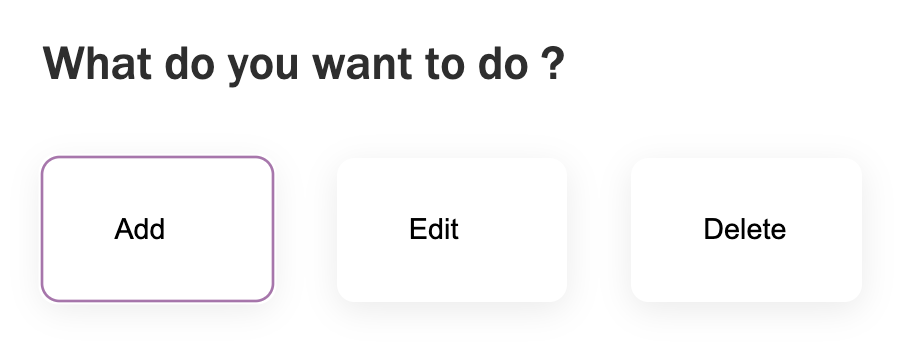
4. Select Add/Edit/Delete.
5. Upload the file in one of the 3 ways available. (Please refer to the Uploading file section)

6. Select the Header Row in the table preview and click Next.

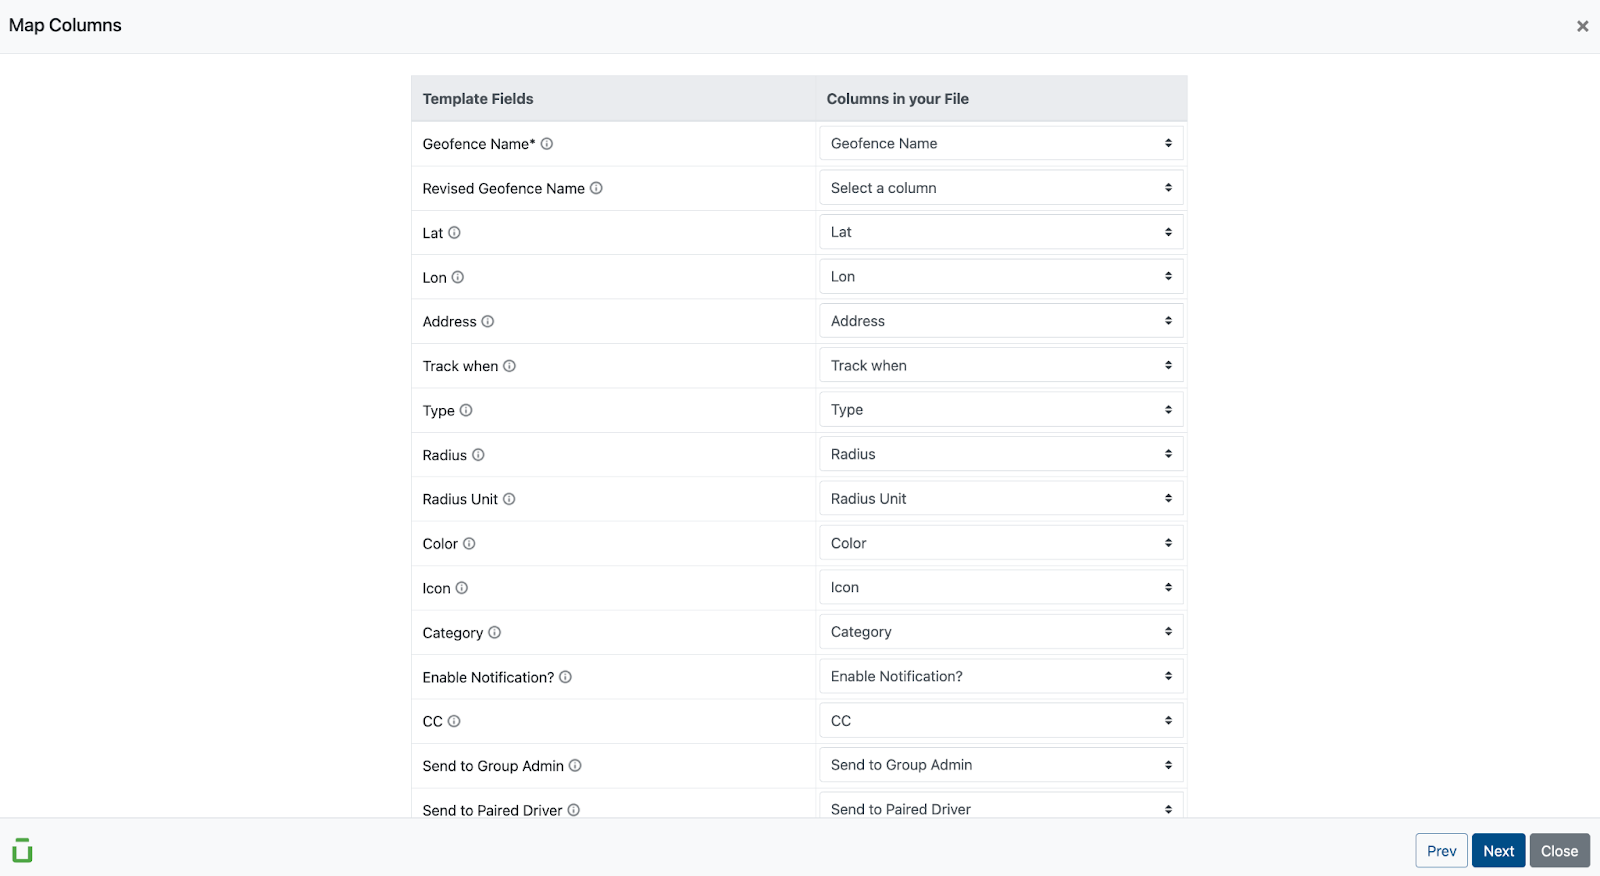
7. Map the Columns in your file to Template Fields and click Next. (Please refer to the Column mapping section below)
8. Verify the Data and make any changes required and click on Submit. (Please refer to the Data Verification section below)
9. AData upload Summary will be displayed.
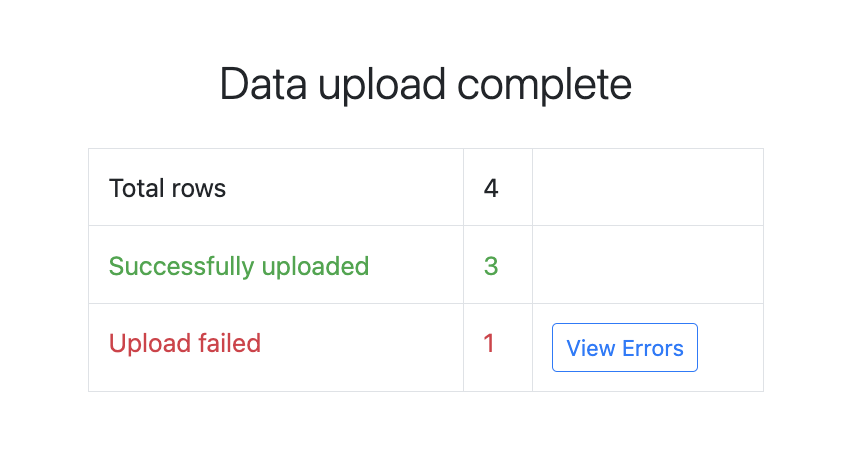
10. Click on View errors to see the errors and make changes and submit. (Please refer to the Error Handling section below)
Uploading File
Users can use the Bulk Add/Edit/Delete template attached to the Upload file page.

Using this template will automatically attempt to map each column to Template fields in the Column mapping page.
Users can use a custom template based on their convenience.
We can upload a file in Three ways:
- Drag and Drop the File
- By Selecting the File
- By Pasting the contents of the File


- Only CSV, XLSX, and XLS files can be uploaded.
Column Mapping
Column Mapping is where we map the columns of the uploaded file to Template Fields which will show up in the UI.
Columns will be automatically mapped when the Template is used or we should select columns accordingly.
A few Mandatory columns marked with * need to be mapped.

Column mapping for Add function
Column mapping for Edit function

Column mapping for Delete function
Data Verification
The Data Verification page is where users can see and verify the mapped data and make any changes to it.
Cells with Red background must be changed to valid values.

- Columns left blank in for Edit function will retain previous values.
Error Handling
For any incomplete upload, when we click on “View error” the user will be taken back to the Verify Data page. Users can see error messages and make changes accordingly. Upon re-submitting the bulk upload request and additional errors will be highlighted until resolved.
Error Cell will be displayed in Yellow color.
- Users can export this page and make changes.
Last Verified on November 2025