
Installation Guide for JBUS.


Table of Contents
OVERVIEW
WHAT’S IN THE BOX?
REVISION HISTORY
INSTALLATION-JBUS
SETUP- AZUGA FLEET TRACKING
Overview
We appreciate your interest in choosing Azuga as your fleet tracking partner. This document provides instructions for a new user on
• How to install JBus into your vehicle.
• How to set up the device in the Azuga fleet applications.
Before installation, kindly note the device serial number (Printed on the device). You will need this information at a later time to set up your device in the Azuga App.
What’s in the box?
|
JBus device |
JBus device is shipped with the standard cables attached. |
Installation-JBus
Based on the type of port, a JBus device can be installed through any of the following
1. 16 Pin Port
2. 6 Pin/9Pin Port
16 Pin Port:
Locate the Vehicle’s diagnostic port, typically it can be found below
the steering wheel. Follow the below steps to install JBus
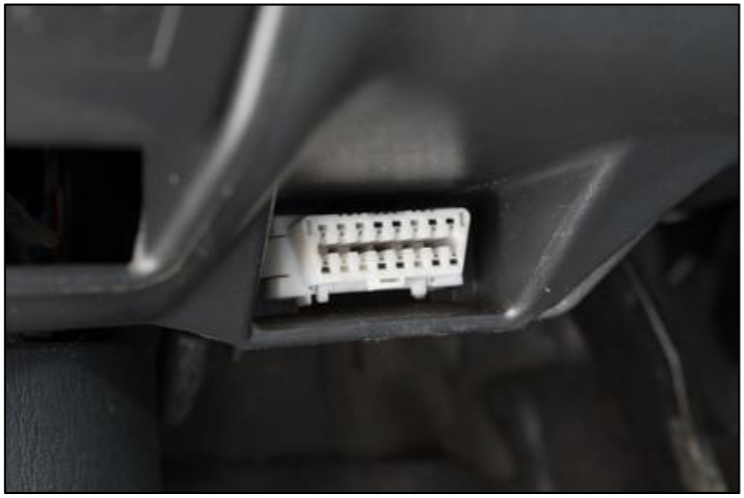
1. Switch off the vehicle or the unit on which the installation is performed.
2. Plugin the Azuga device into the diagnostic Port (Fig:1).
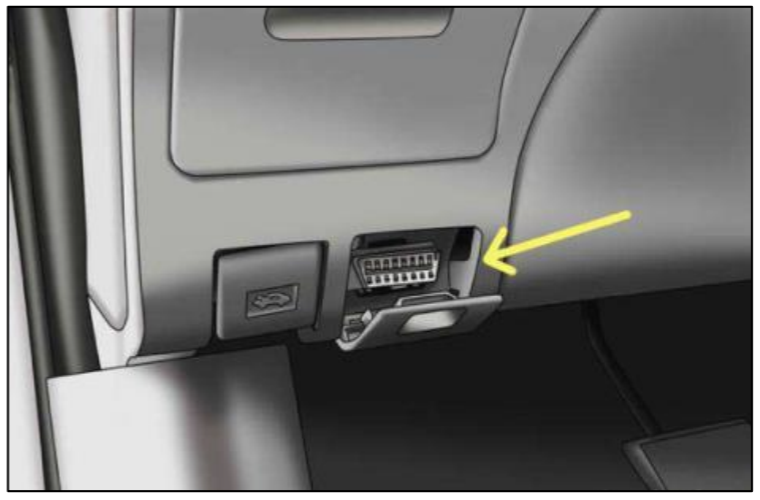
3. If the port is covered by a panel/door(Fig:2), use the extension cable to install the device. Ensure the device is not protruding from the panel.
| Important: To get additional accessories like an extension cable reach out to customercare@azuga.com |
4. Setup is initialized and power is received once the LEDs on the Azuga device start flashing.
5. Ensure the Green LED lasts for 5 seconds, which indicates the device is ready to use.
|
Note: If the Red LED blinks, the installation is failed, remove the device and repeat the same steps. If the problem persists kindly reach out to customercare@azuga.com |
6/9 Pin Port
1. Plug the cable to the vehicle diagnostic port as shown below.
2. Plug the device into the other end of the cable.

3. Ensure the Green LED on the Azuga device lasts for 5 seconds, which indicates the device is ready to use.
|
Note: If the Red LED blinks, the installation is failed, remove the device and repeat the same steps. If the problem persists kindly reach out to customercare@azuga.com |
6/9 Pin Port- Occupied
If the vehicle diagnostic port is occupied already, use the Y-cable to install the Azuga device.
|
Note: For additional accessories like a Y cable, reach out to customercare@azuga.com |
1. Plugin the female end of the Y-cable into the diagnostic Port.
2. Connect the Azuga device to another end of the Y cable.

3. Ensure the Green LED on the Azuga device lasts for 5 seconds, which indicates the device is ready to use.
|
Note: If the Red LED blinks, the installation is failed, remove the device and repeat the same steps. If the problem persists kindly reach out to customercare@azuga.com |
Setup- Azuga Fleet Tracking
The installed JBus device needs to be set up for fleet tracking. Below are the 2 methods to set up the device
• Setup from Fleet Mobile App
• Setup from Fleet Web App
|
Important: If Login credentials are not yet received, reach out to customercare@azuga.com It is recommended to change the password when you log in for the first time. Refer FAQ section in the Azuga web application for more information. |
Azuga Fleet Mobile App
1. Login into Azuga Fleet Mobile App and navigate to
UTILITIES>>INSTALLATION.
| Note: If the Installation feature is not available Kindly reach out to customercare@azuga.com |
2. Tap Installation and Select the JBus Plug’n’Play option.

3. Device serial can be fed by any of the following methods
I. Tap the Where to Scan button and scan the barcode printed on the Azuga device.
II. Type the serial number manually.
4. Click the Continue button, verify the details shown and Click Submit.
Azuga Fleet Web
1. Open Azuga Fleet Web Login and enter your Login Credentials.
2. Devices and vehicles are already created in the portal by Azuga. Vehicle names and device serial numbers are the same by default.
| Note: Vehicles(created by default) can be renamed as per your requirements. |
3. Click the ADMIN tab and select Vehicles.
4. Click the Pencil icon to edit/add/remove the details for the selected vehicle.

5. Fill in the mandatory(*) fields and click the Update Vehicle button.

|
Note: Repeat the steps for the remaining vehicles and ensure the vehicle names are unique. Reach out to customercare@azuga.com for additional support. |
PDF copy of Installation Guide for JBUS:
Installation Guide_JBus_Fleet 2.0.pdf
Last Verified on September 2025