
Installation Guide for GV600M Rechargeable Asset Tracker.

Overview
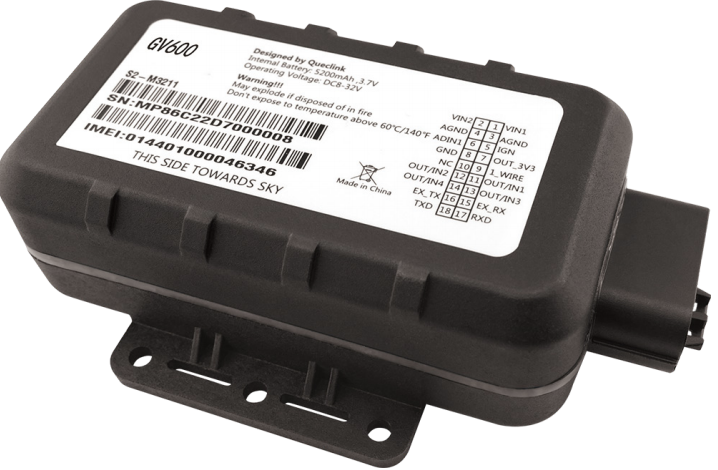
The Asset Tracker GV600 is a ruggedized waterproof GPS tracker specially designed for the trailer, tanker, reefer, and flatbed truck tracking.
It has up to a 120-day standby time using an internal rechargeable 5800 mAH battery and supports one external power source.
What’s in the box?
GV600 Asset Tracker |
|
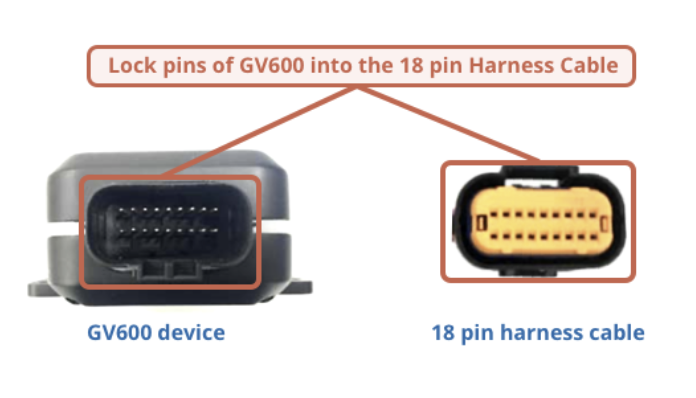
18-pin harness |


Primary connectors
Definition |
Description |
Wire Connector |
Pin |
Power |
Primary Power (8-32V) |
Red |
1 |
AGND (Analogue Ground) |
Primary Ground |
Black |
3 |
Ignition |
Ignition Detection Input, Positive Trigger |
White |
5 |
1-Wire |
Temperature sensor input |
Grey |
9 |
For tracking purposes connect the Red wire to the Primary Power and Black to the Ground. For information on other wires please contact us @customercare@azuga.com.
Note - The main color of the dual-color cable is the first one, for example, Black/White means black is the main color, and white is the secondary color.
Installation Steps
Prerequisites
- Ensure the side with the antenna is facing towards the sky with a clear line of sight to have better signal reception.

- Firmly install the device to a reliable surface to prevent falling off.
- Do not install the device under a metal surface or in enclosed environments having difficulty in getting GPS and network signals.
Steps
- Determine an appropriate location on the asset to mount the device (follow the below guideline)

- The GV600 device must have an unobstructed view of the sky
- The location of the device must be such that the lights from the status LEDs are easily visible
- Install the screws in front.

- Install and tighten 4 screws on the bottom shelf.
Note: Install the screws in opposite angles order. Do not fully tighten the screws at the beginning. When all four screws are installed, then fully tighten them. Otherwise, the waterproof capability may be deteriorated due to uneven tightening.

- Connect the wires to appropriate power sources
- The power input (Red wire) must be connected to a constant +12V or +24V power supply.
- The ground line (Black wire) must be connected to the chassis ground.
3: Observe the following LED sequence once installed

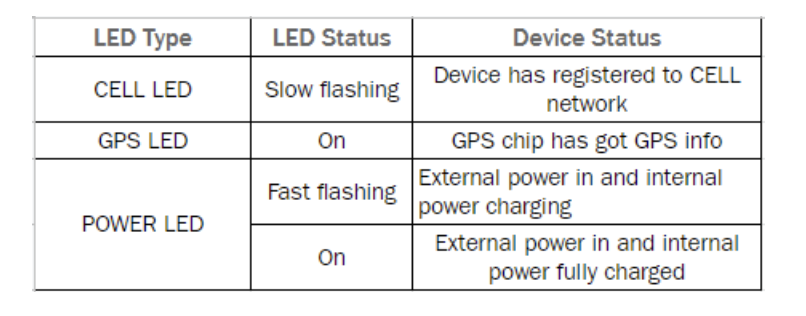
Note: If the device is showing the above-mentioned LED statuses, please proceed to set up the device on Azuga in the next step or contact customercare@azuga.com for further assistance.
Setting up asset tracking on Azuga Fleet
The Azuga Fleet web application allows you to set up, track and manage your assets. To start tracking, you need to assign the tracking devices to your assets. The steps to do this are listed below:
- Note down the serial number of the asset tracker device. Identify which asset this device will be installed into and give it a ‘friendly name'. For example, ‘Generator’. Note this down. Please keep these asset names short.
Note: Ensure this step is repeated for all devices that you have with you.

- Log into the https://fleet.azuga.com/login Fleet web application using your credentials.
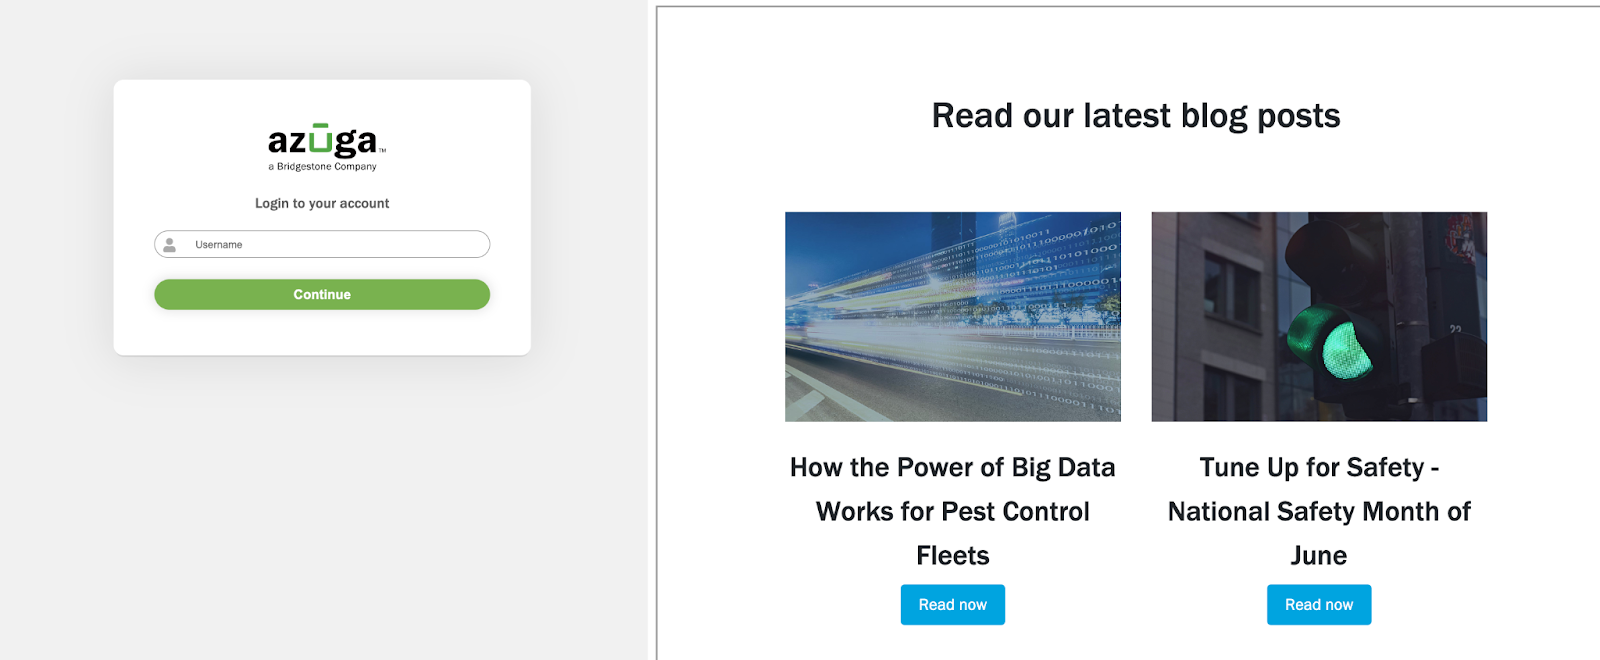
Note: recommend that you change your password the first time you log into Azuga
portal.
- Click here How to change password to learn more about changing the password.
- In case you forgot your password, Azuga lets you reset your password. Click here Reset Password.
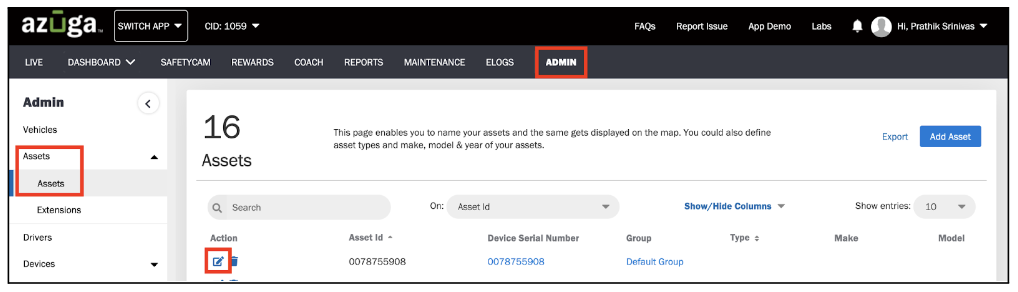
- Once you login, navigate to the Assets page under the Admin tab
- Type the IMEI number of the device you noted down. You will notice that the asset name is the same as the device serial number. Azuga does this by default when the devices are initially tested.
- Click the pencil icon corresponding to the asset you wish to edit.
- Update the form with appropriate details. Click the field you wish to edit and add/modify/remove text. Change the asset name and give it a ‘friendly name’ (e.g. 'Generator’). This name needs to be unique. You cannot have two assets with the same name. Also, fill in the mandatory fields (marked with a *)
- Click Update Asset. Repeat these steps for the remaining assets. Note that the asset names need to be unique.
Where are my assets located?
The Live page on the Azuga website lets you track your assets in real-time. It gives you the latest snapshot of all the assets present in your account. It provides you with details such as the current location, the last activity reported to the server, and speed. You can also find the current location of an asset by looking at the map.
Click the name of the asset to get the breadcrumb trail of the asset’s movement.

PDF copy of Installation Guide for GV600M Rechargeable Asset Tracker:
https://drive.google.com/file/d/1DMHlrUFo0f7ndppt1K23zZ99XLedKj1t/view?usp=sharing
Last Verified on Mar 2025