
Installation Guide for GL500M Asset Tracker.

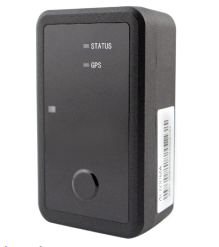
Asset Tracker GL500M
The Azuga GL500M is a battery-operated asset tracking device with superior cellular and GPS performance and exceptional power management. This device is designed for managing assets deployed for long periods without power or maintenance needs. It includes a waterproof GNSS tracker that features standby time powered by internal batteries.
What's in the box?


Device Activation Process
Before proceeding with the installation of the asset tracker, the device should first be activated. The activation process should take about 15-20 minutes depending on the network coverage and location. The activation process is briefly outlined below:
- The Power Button has to be pressed for more than 3 seconds to activate the device.
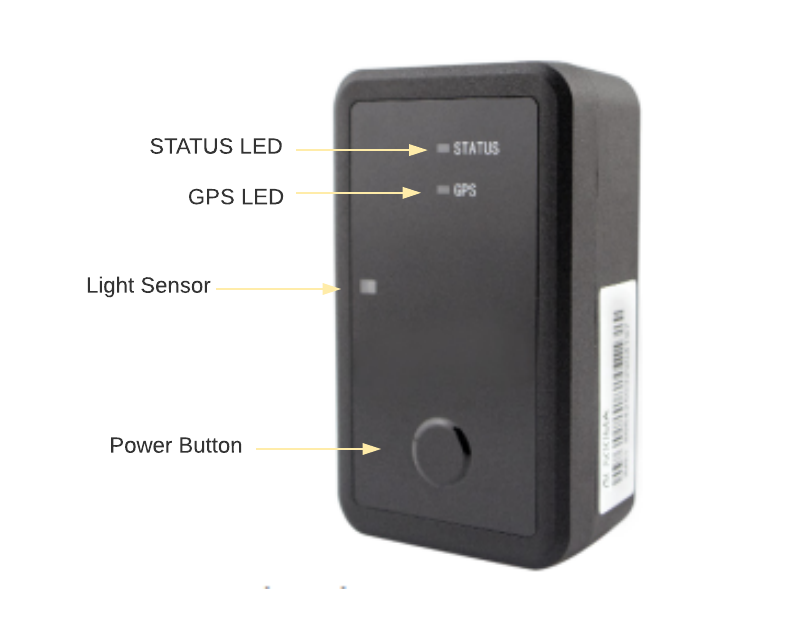
- Once activated, the LED lights on the asset tracker will start blinking.
- The device initially searches for the GSM network to register the device. STATUS LED fast blinks initially which is an indication of the device searching for the GSM network to register the device. Once the device is registered, the LED would flash slowly.
- The GPS LED of the tracker will blink fast while the GPS chip is searching for the satellites to locate the positioning of the device, it will turn solid once the GPS coordinates are received by the device.
- Once the device is activated, the activation status of the device can be viewed under the ACTIVATION DATE column under ADMIN >> Devices >> Activation Date (To check the activation status of the device)
Note: The asset tracker can also be moved for a couple of yards to ensure that the
activation is successful.

Where are my assets located?
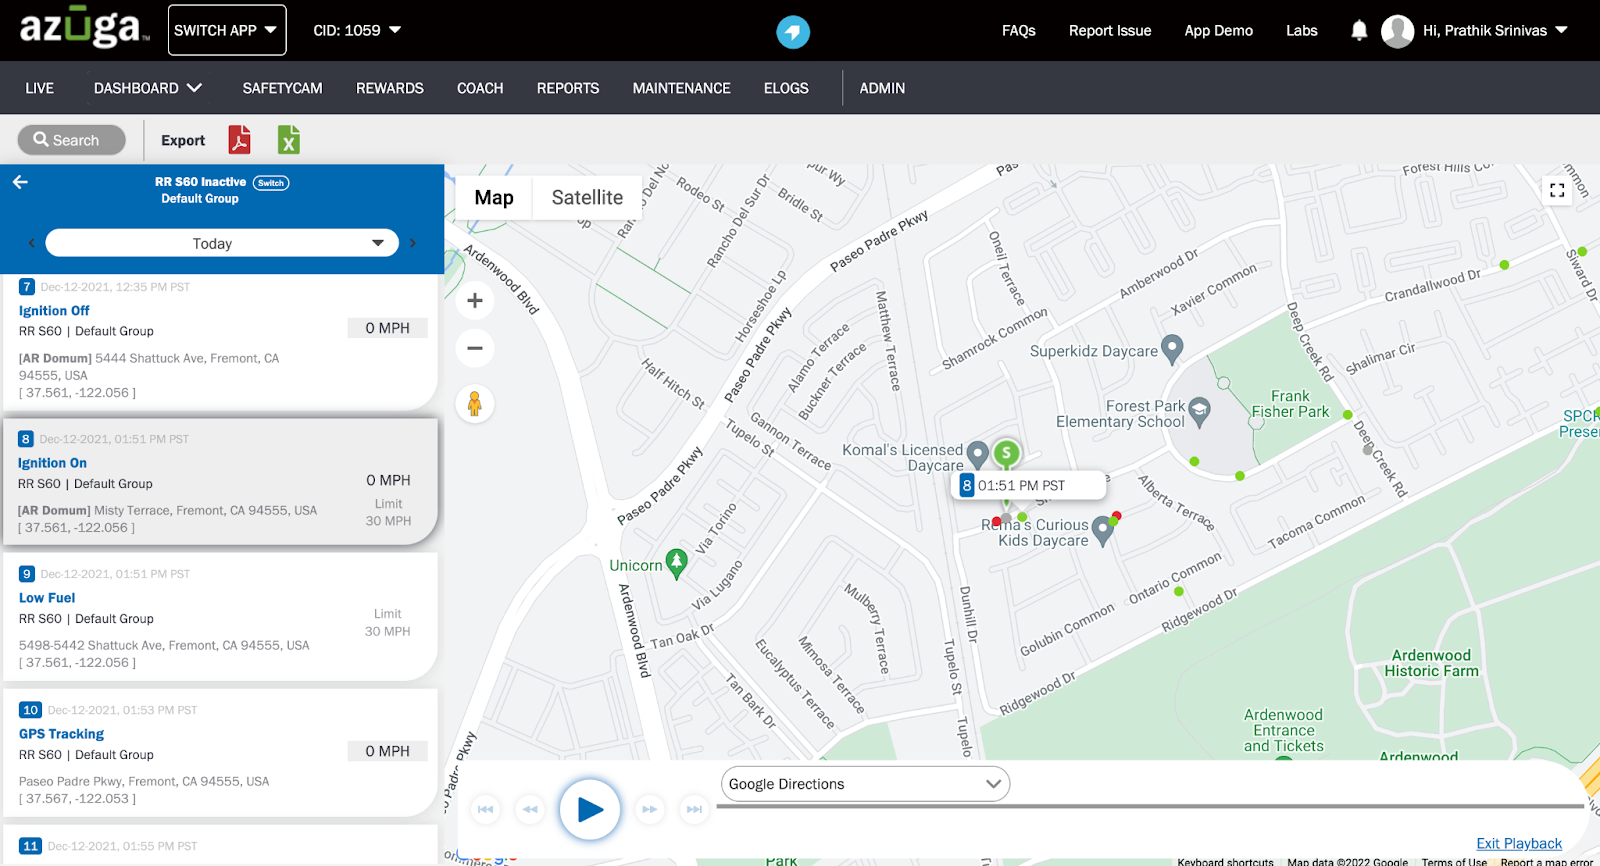
Once the Asset tracker is successfully activated and some movement is detected, wait for 5-10 minutes and you will be able to view the events from the asset tracker on the Live Page. The Live page on the Azuga website lets you track your assets in real-time. It provides you with details such as the asset’s current location, last reported activity, and the speed of the asset. Click on the Asset’s name to get the Breadcrumb trail of the asset’s movement originated from the asset tracker.
Installation Steps
Once the device is activated, the asset tracker can be mounted on the asset using any of the two methods outlined below. The installation process should take approximately 15-20 minutes or more, depending on the nature of the asset.
Method 1: Magnetic Pad Installation:
- Place the magnetic mount hooks of the mounting bracket on the asset tracker and hook the mount on the tracker.
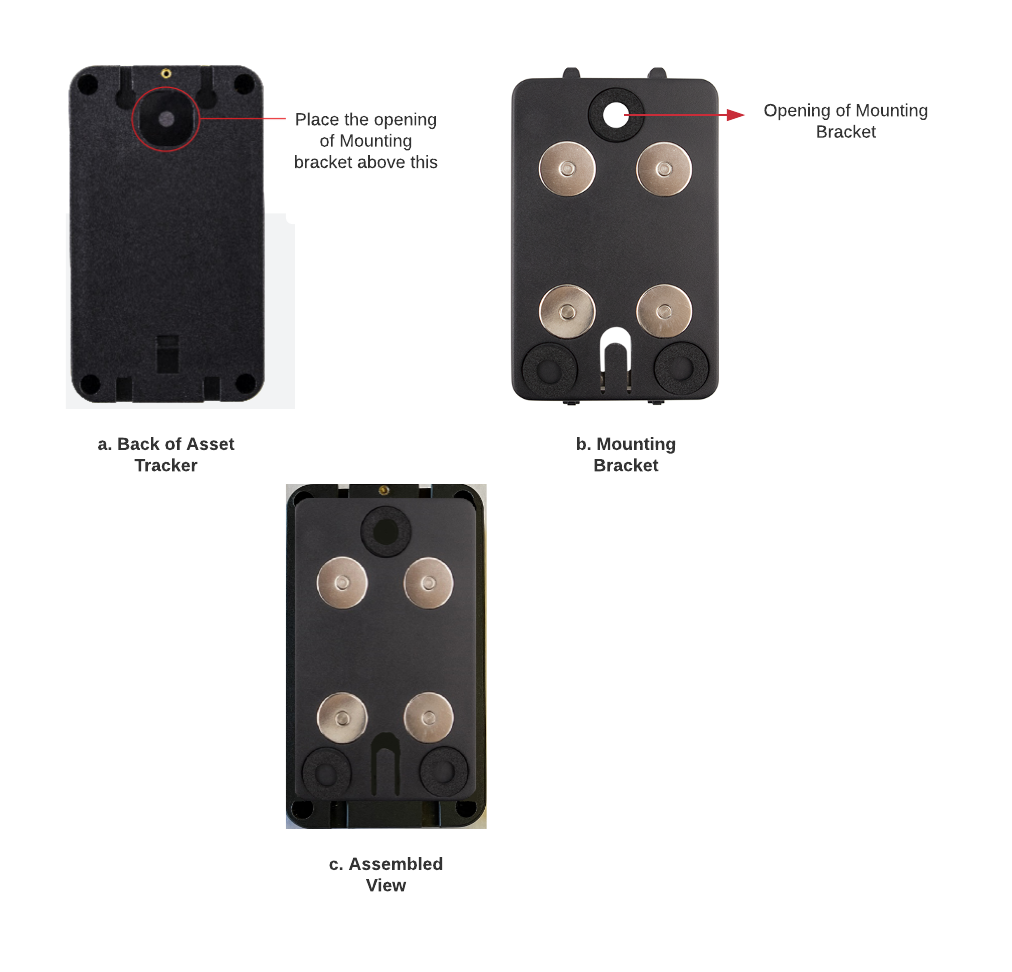
- Ensure that the circular opening in the center of the mounting bracket has to be placed on top of the asset tracker as shown in the above image.
- The tracker can be installed on any metallic surface of the asset. The four magnets on the mounting bracket will help the asset tracker to attach to the surface of the asset.
Method 2: 3M tape Installation
- Remove the sticker from one side of the 3M tape and place it to the back of the asset tracker.
- Once assembled, remove the other side of the tape and install the tracker on the surface of the asset.

Note: Do not install the device under a metallic surface of the asset or in enclosed
environments having difficulty in receiving GPS and network signals.
Manage Assets on the Azuga web portal
The Azuga Fleet web application allows you to set up, track and manage your assets. To start tracking, you need to assign the tracking devices to your assets.
- Note down the IMEI of the asset tracker device (the IMEI can be found printed on the label on the side of the device). Identify which asset this device will be installed into and give it a ‘friendly name' for easy reference. For example, ‘Generator’. Ensure this step is repeated for all devices that you have.

- Once you log in, navigate to the Assets page under the Admin tab.

- Type the IMEI number of the device you noted down. You will notice that the Asset name is the same as the Device serial number. Azuga does this by default when the devices are initially set up.
- Click the pencil icon corresponding to the asset you wish to edit.
- Update the below form with appropriate details. Click the field you wish to edit and add/modify/remove text.
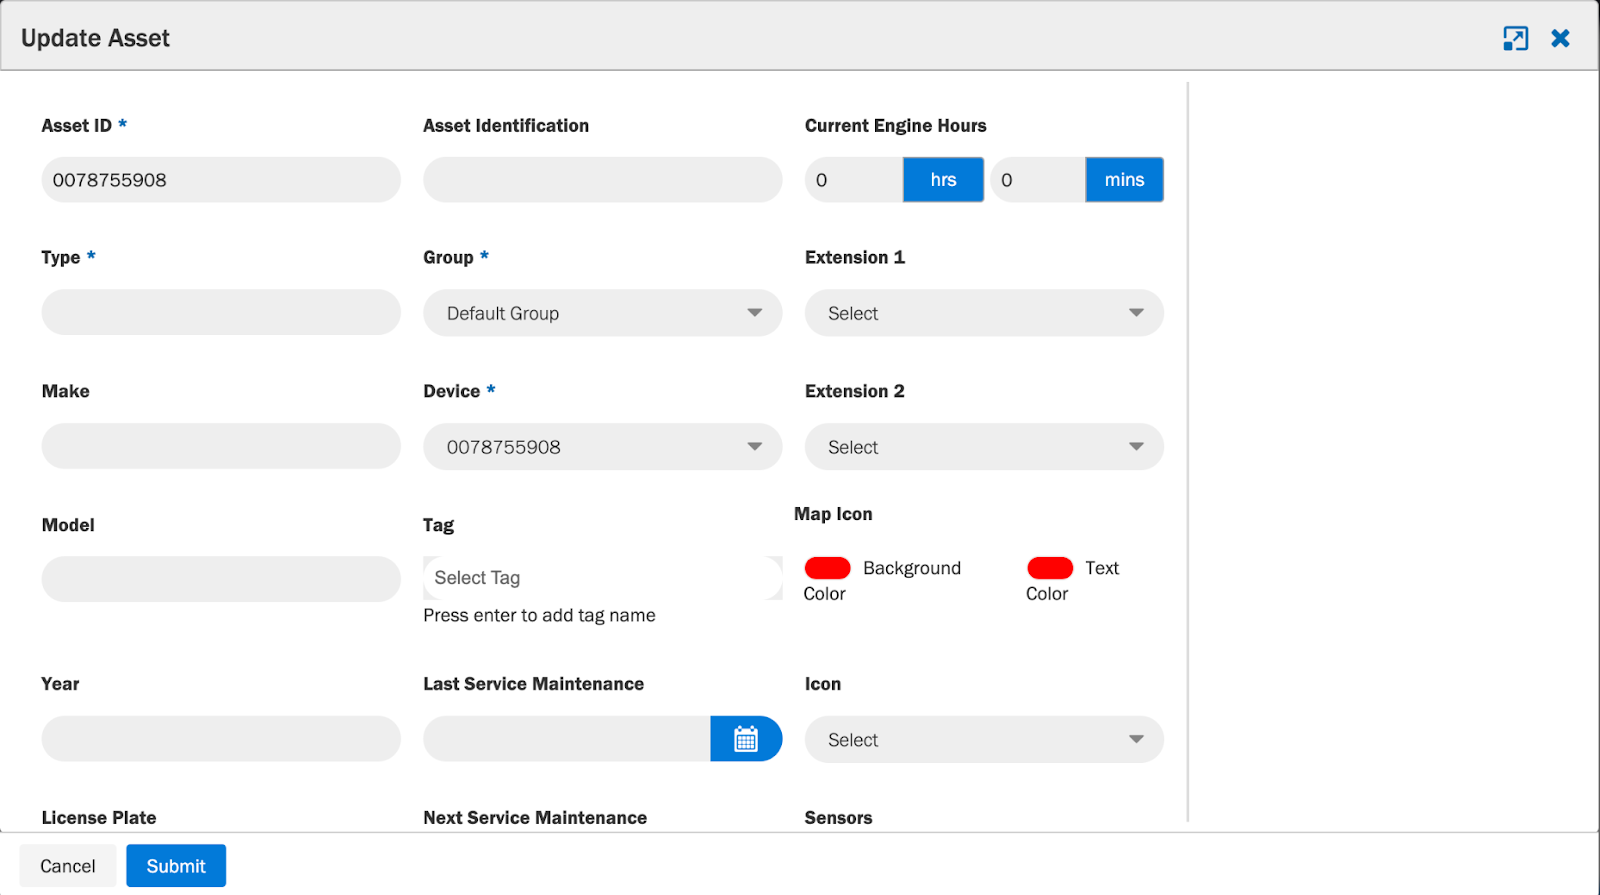
- Change the asset name and give it a more friendly name (e.g. 'Generator’). This name needs to be unique. You cannot have two assets with the same name (Fill in the mandatory fields marked with a *).
- Click on Update Asset. Ensure that the steps are repeated for the remaining assets in the account.
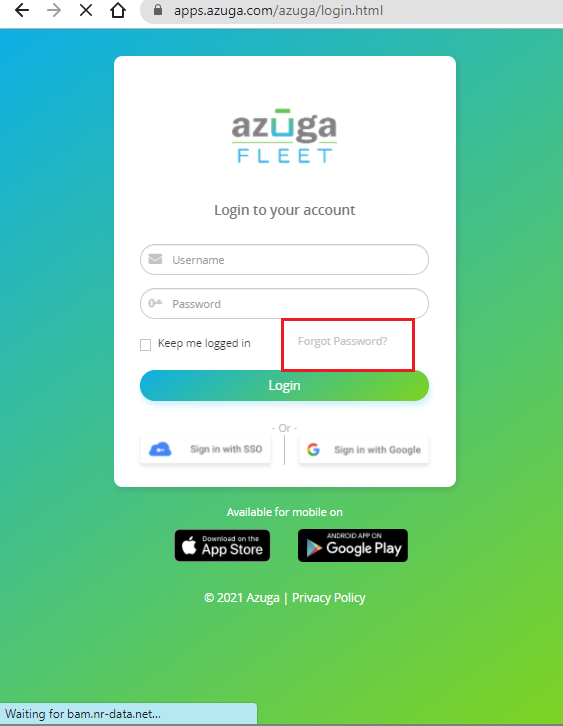
Note: Log into the Azuga Fleet web application using your credentials. It is recommended that you change your password the first time you log into the Azuga Fleet portal. Click on How to change password to learn more about changing your password.
PDF copy of Installation Guide for GL500M Asset Tracker:
[Customer] Installation Guide _ Asset Tracker _ Queclink GL500M _ Fleet 2.0.pdf
Last Verified on Mar 2025