
Installation Guide for GL502MG Asset Tracker


Overview:
The Azuga GL502MG is a widely used asset tracker designed specifically for tracking and monitoring non-powered assets. A non-powered asset is any asset that does not have its own power source.
Examples include:
- Trailer containers
- High-value equipment or components
- Porta-potties
The GL502MG is equipped with an internal battery that enables long-term tracking without relying on external power.
What’s in the Box?:
|
GL502MG Asset Tracker |
|
|
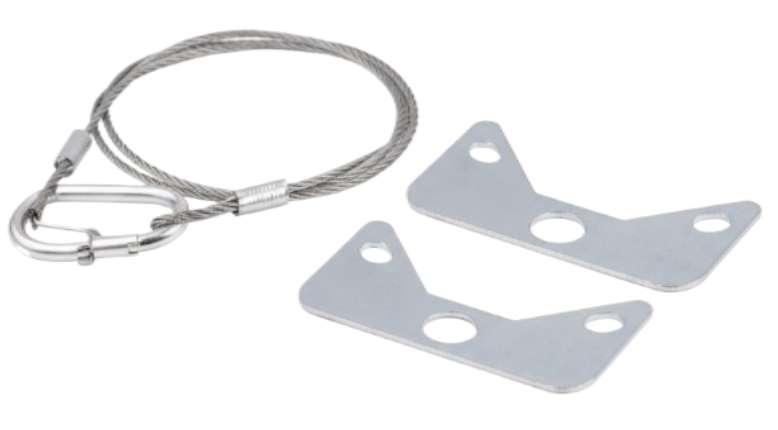
Lanyard Kit |
|
|
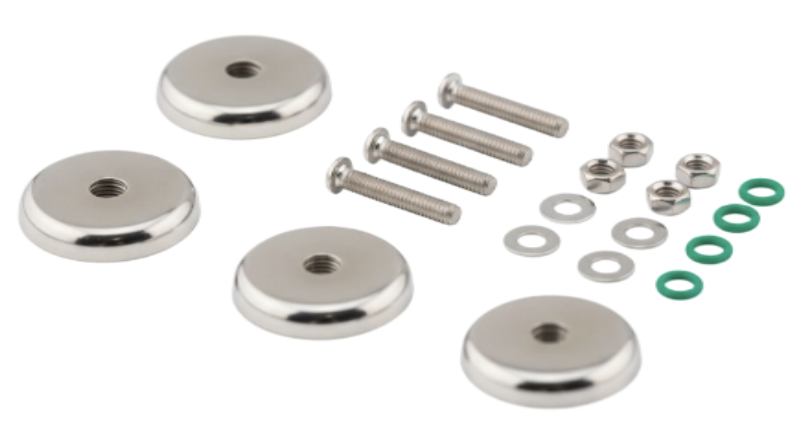
Magnetic Mount |
|

Installation Precautions:
- Firmly install the asset tracker on a reliable surface to prevent it from falling off.
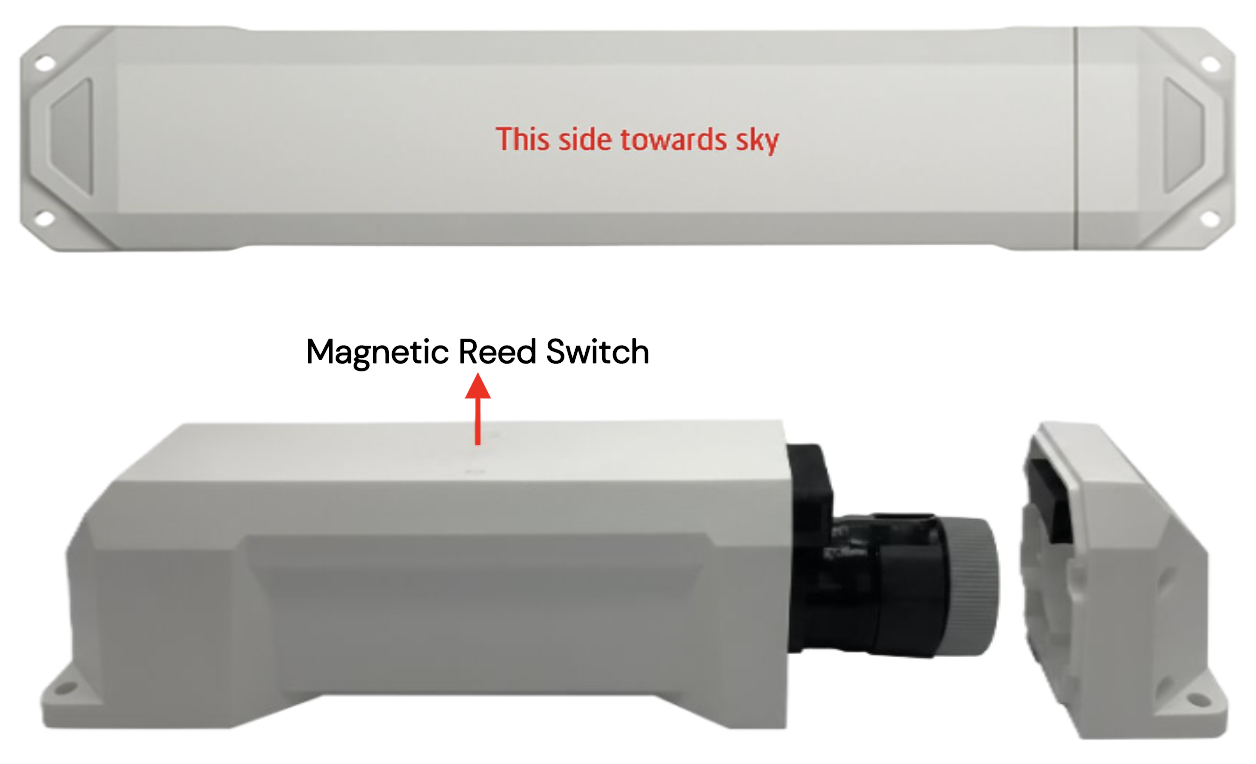
- Ensure the side with the antenna faces the sky for optimal signal reception.
- Do not install the asset tracker under metal surfaces or in enclosed areas with poor GPS or network signal availability.
Installation of GL502MG Asset Tracker:
The GL502MG asset tracker can be installed on non-powered assets using either of the following methods:
- Magnetic Mount
- Conventional Mounting Method
Magnetic Mount:
Follow the steps below to install the GL502MG asset tracker using the magnetic mounting method:
- Identify a suitable mounting location where the asset tracker needs to be installed.
- Ensure the mounting surface is flat/level and free of rust.
- Verify that the lanyard can wrap around or pass through the cross member for a secure fit.
- Place the asset tracker with its top surface facing the sky.
| Note: GPS performance is most accurate when the tracker’s top surface faces the sky. |
- Mount the device and ensure all four magnets are fully engaged and firmly attached to the asset’s frame member.
- Loop the lanyard around the frame member.
| Important: If needed, drill ¼” holes in the frame member and pass the lanyard through. |
- Attach the lanyard plate to the device, then feed the threaded link through the lanyard loop and clip.
- Ensure the lanyard connected to the device is securely wrapped around the frame member.
Conventional Method:
Follow the steps below to install the GL502MG asset tracker using the conventional mounting method:
- Identify a suitable mounting surface where the asset tracker needs to be installed.
- Ensure the mounting surface is flat/level and free of rust.
- Drill four mounting holes on the asset surface based on the asset tracker’s measurements.
- Insert the screws from the inside of the surface, place the asset tracker onto the screws, and tighten the nuts securely.
| Important: Drive the screws slowly to avoid seizing. |
Powering the Asset Tracker:
- To activate the GL502MG asset tracker, place the provided magnet over the magnetic reed switch on the tracker for a few seconds.
- The reed switch detects the magnetic field, and once detected, it switches to an open position, powering on the asset tracker.
- After activation, the magnet can be removed or left on top of the asset tracker.
| Note: Removing or keeping the magnet after activation does not affect the asset tracker’s functionality. |
Setting Up and Managing Assets in Azuga Fleet:
The Azuga Fleet web application allows you to set up, track, and manage your assets.
To begin tracking, you must assign the tracking devices to their respective assets. Follow the steps below:
Step 1: Prepare Asset Details
- Note down the serial number of the asset tracker device. Identify which asset the device will be installed on, and assign a friendly name (for example, Generator).
Step 2: Log In to Azuga Fleet
- Log in to the Azuga Fleet web application using your credentials.

Step 3: Access the Assets Page
- Once logging in, navigate to the Assets New page under the Admin tab.
- Enter the IMEI number of the asset tracker you noted earlier in the search box.
- You will notice that the asset name appears as Azuga Devices by default, along with the Device Type assigned during initial testing.
- At the end of the asset row, click the three-dot menu and select Edit.

Step 4: Update Asset Information
- Update the form fields as needed.
- Edit or add details such as the asset name, ensuring it is a unique and descriptive friendly name (for example, Generator).
- Fill in all mandatory fields (marked with an asterisk *).
- You can add, modify, or remove text as required.
Step 5: Save the Changes
- Click Save to save your changes.
- Repeat the same steps for all remaining assets.
- Remember, each asset name must be unique; duplicate names are not allowed.

Viewing Assets Location:
The Vehicle Live page on the Azuga Fleet web lets you track your assets in real time, providing the latest snapshot of all assets linked to your account.
It displays key details such as:
- Event
- Current location (Address)
- Last reported activity (Date & Time)
- Speed
You can also view the asset’s current position directly on the map.
To see an asset’s movement history, click the asset name to view its breadcrumb trail.

PDF copy of Installation Guide - [Customer] GL502MG Asset Tracker - Installation Guide.pdf
Last Verified on September 2025