
ADAS Calibration
Overview:
We appreciate your interest in choosing Azuga as your fleet safety partner. This Document covers instructions to calibrate AI SafetyCam for road-facing Advanced Driver Assistance System (ADAS) alerting.
The AI SafetyCam uses ADAS features to gather information about the road ahead. It detects events such as:
- Tailgating - your vehicle is driving too close to the vehicle in front of you.
- The camera captures the snapshot.
- Lane Departure - your vehicle crosses over a certain number of lane marking lines in a specific amount of time.
- The camera captures only the event.
Getting Started:
In order to get started with road-facing advanced driver-assistance system (ADAS) features, which gather information about the road ahead and detect tailgating events, your safetycam first needs to be calibrated. Calibration ensures the accuracy and quality of triggered events. The road-facing ADAS calibration process for almost any device on the market demands precision and a bit of extra time than other calibration processes might.
For the AI Cam, the calibration process is dynamic. This requires recording several measurements related to vehicle size and the position of the installed safetycam, and then driving the vehicle on the highway for approximately 5 minutes before beginning configuration.
This document describes how to prepare for road-facing ADAS calibration.
Recording the Measurements:
To enable this feature, you'll need a few measurements that can be taken ahead of time. Record these measurements in centimeters or inches.
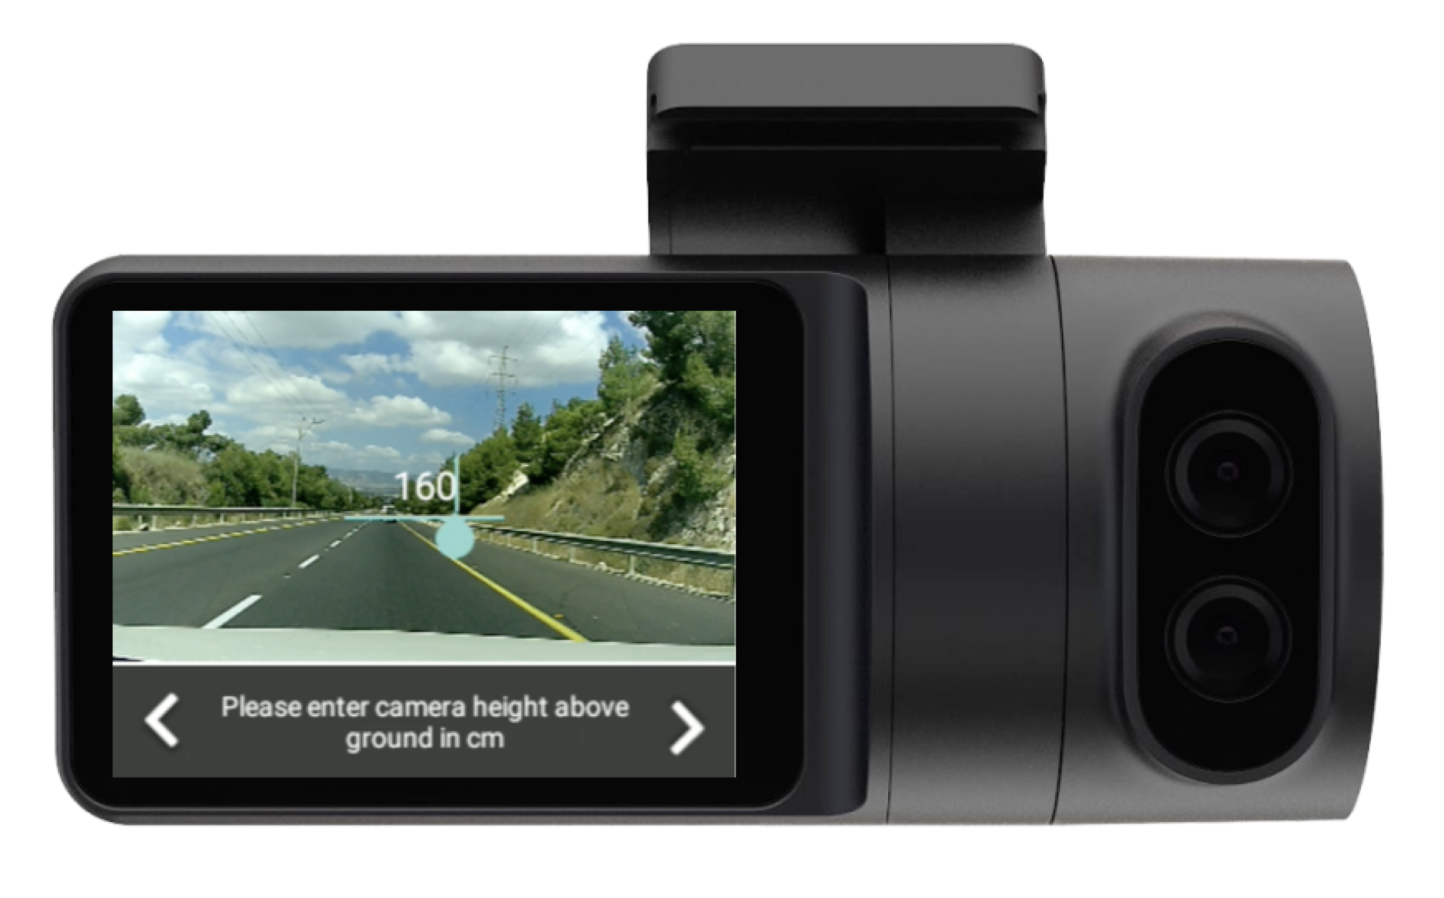
| Note: The safetycam should first be installed at least 1.6 meters (160 centimeters/5.249 feet/62.99 inches) above the ground before beginning ADAS calibration. This is mandatory. |
- Safetycam height from the ground.
- Rear axle width from the outer edges of each tire.
- Safetycam offset from the center of the windshield.
Next Steps:
Once you've recorded the measurements:
-
Drive the vehicle at above 75 km/h (46.6 mph) for around five minutes. Images from this drive are automatically obtained and saved to be used later in the calibration process.
Until your vehicle is calibrated, images are obtained and saved during every drive above 75 km/h (46.6 mph).
- Calibrate the safetycam for road-facing ADAS. This includes selecting an image from your drive and inputting the measurements from the previous section.
How to Calibrate:
Follow the below mentioned steps to calibrate your AI Cam:
| Note: The safetycam should first be installed at least 1.6 meters (160 centimeters/5.249 feet/62.99 inches) above the ground before beginning ADAS calibration. This is mandatory. |
-
Drive the vehicle at above 75 km/h (46.6 mph) for around five minutes. Images from this drive are automatically obtained and saved to be used later in the calibration process.
Until your vehicle is calibrated, images are obtained and saved during every drive above 75 km/h (46.6 mph).
- Park the vehicle safely.
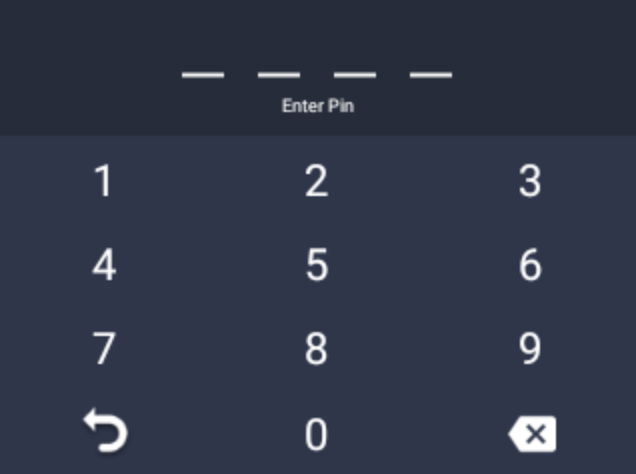
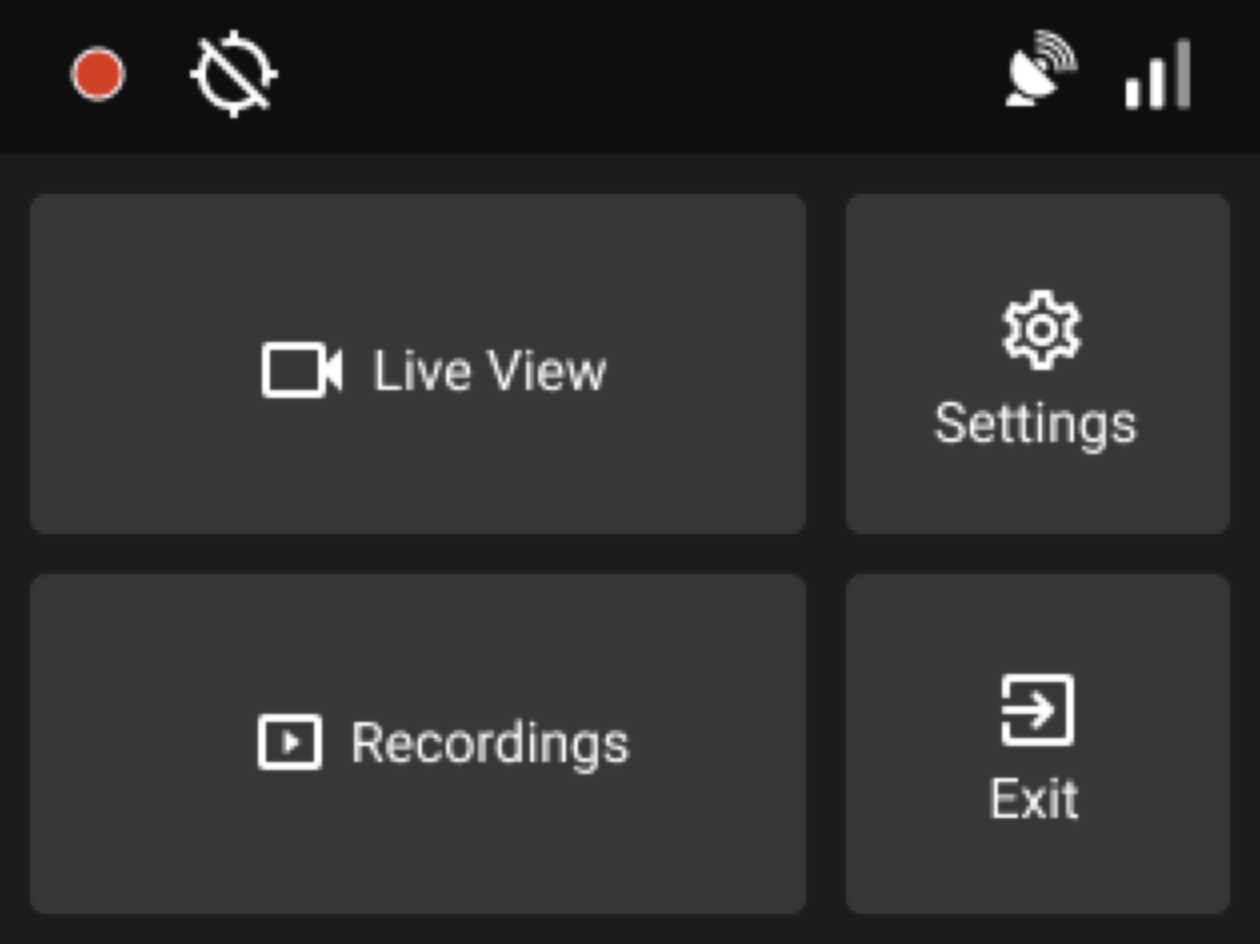
- When you are in the parked vehicle with the parking brake on, the ignition on, and the door closed, press the touchscreen of the safetycam to view the PIN screen.
- Enter the default PIN 3333 to unlock the safetycam for the first time, or your own PIN subsequently. The screen unlocks and the menu appears:
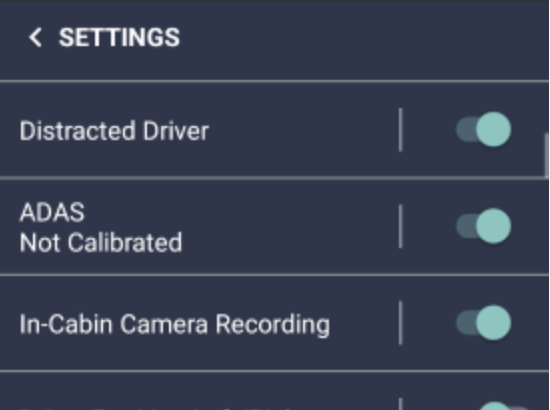
- Press Settings.
- Scroll down to ADAS and toggle the button to turn calibration on. The set up for the calibration process begins automatically.
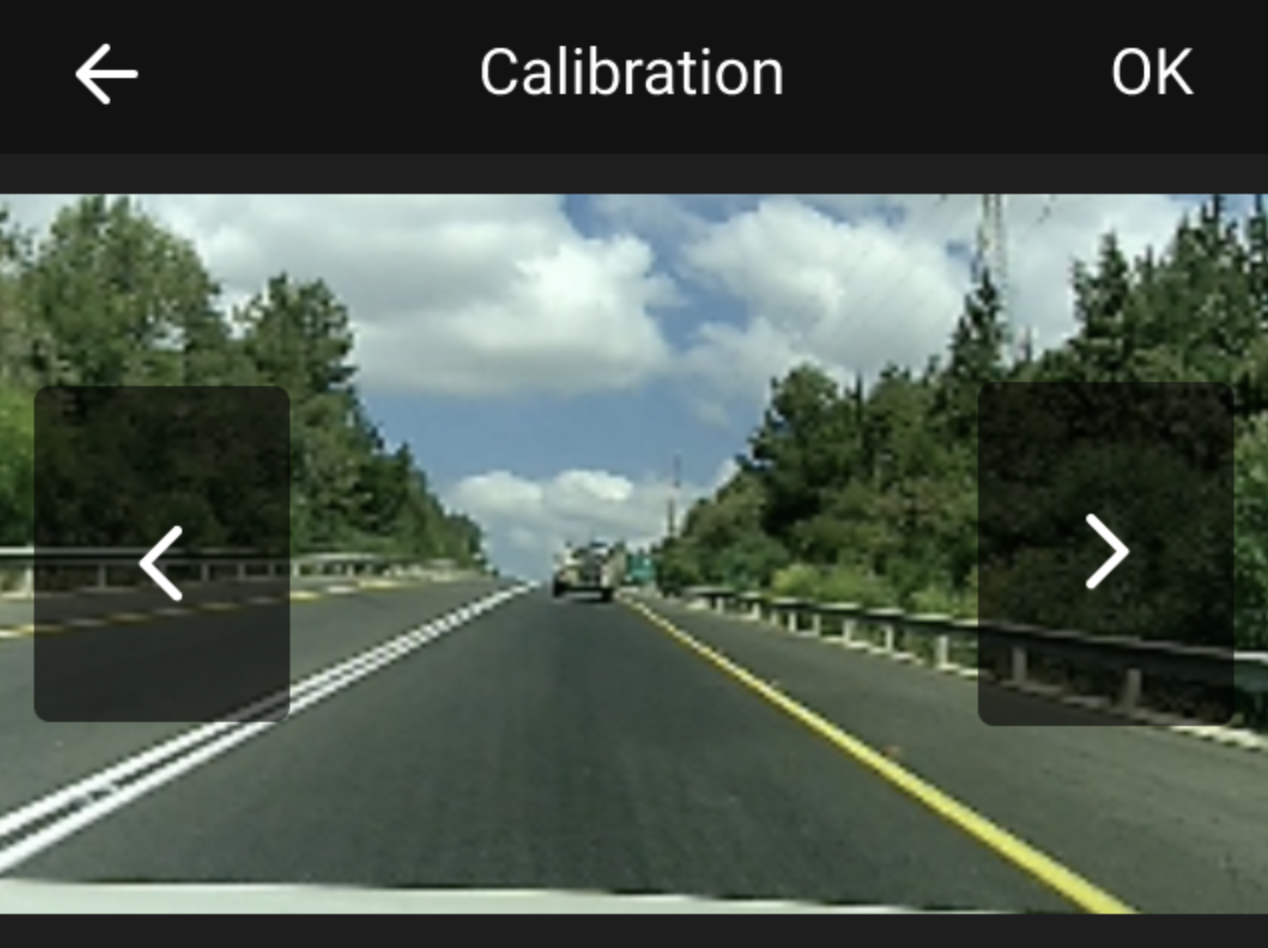
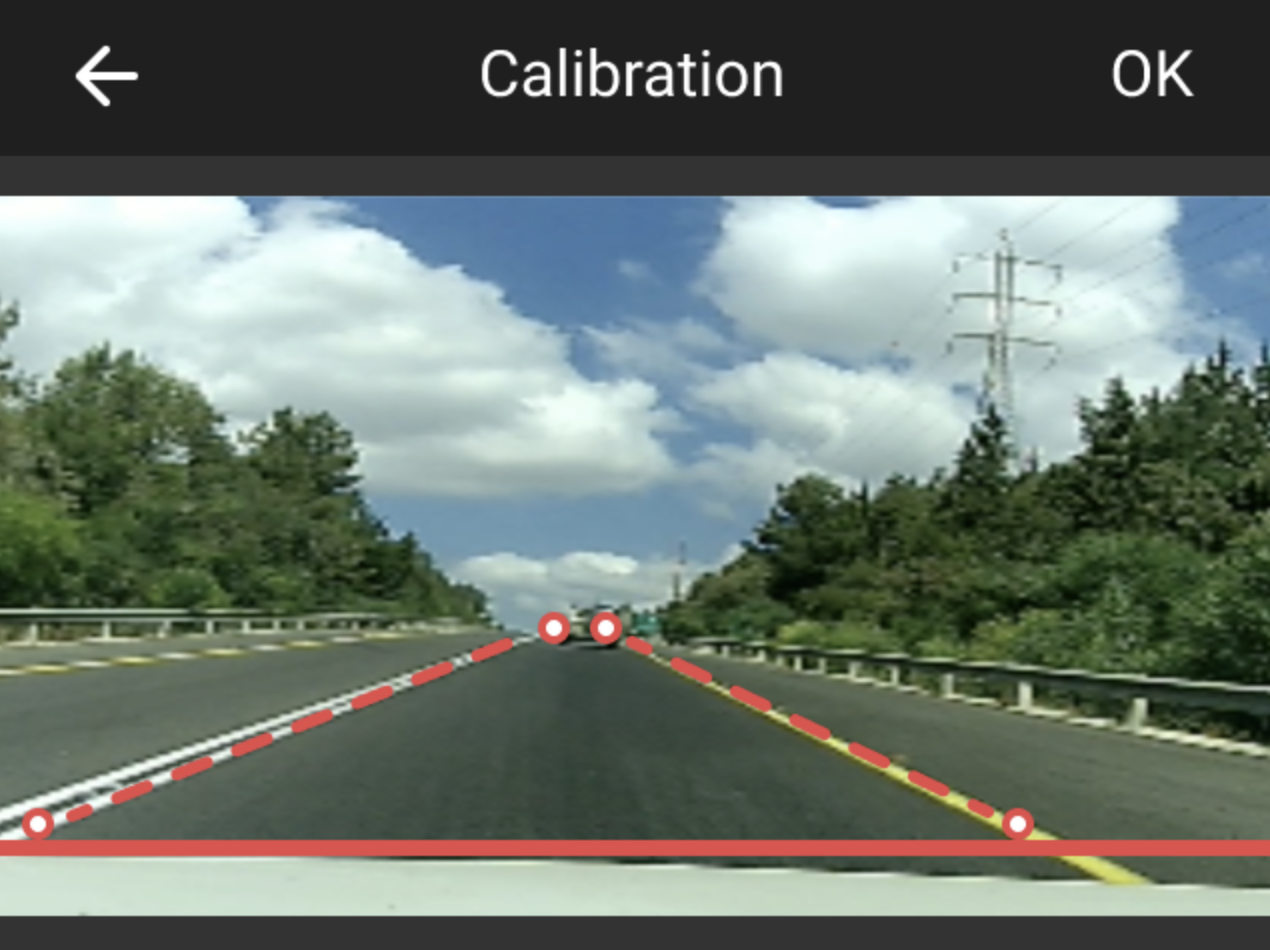
- Press the upper left and right arrow buttons to view various image options. These images are those obtained in Step 1. Select an image where you have a clear view of the road in front of your vehicle and press OK.
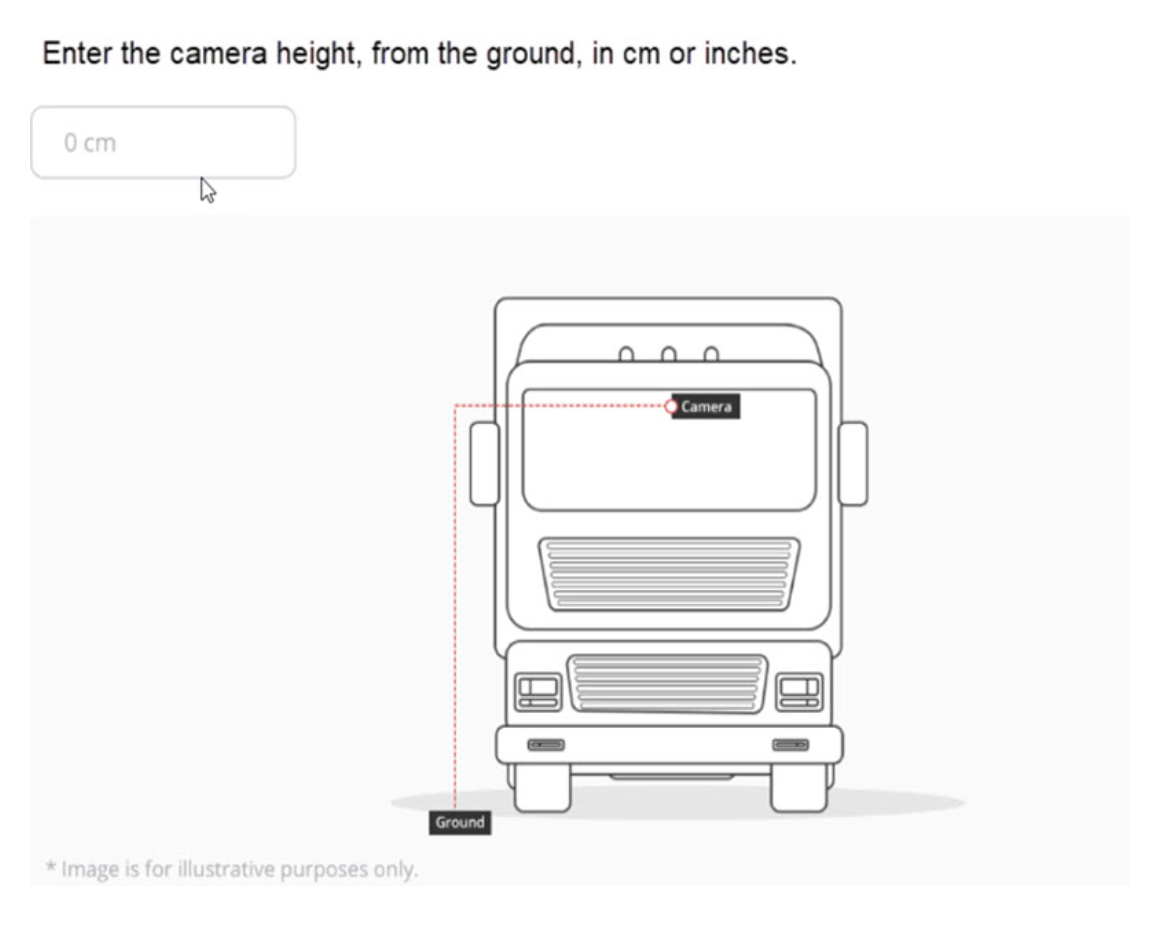
- Enter the camera height, from the ground.
|
Note:
If your safetycam has the Speed setting set to:
These settings can be changed from the Settings menu of the camera. |
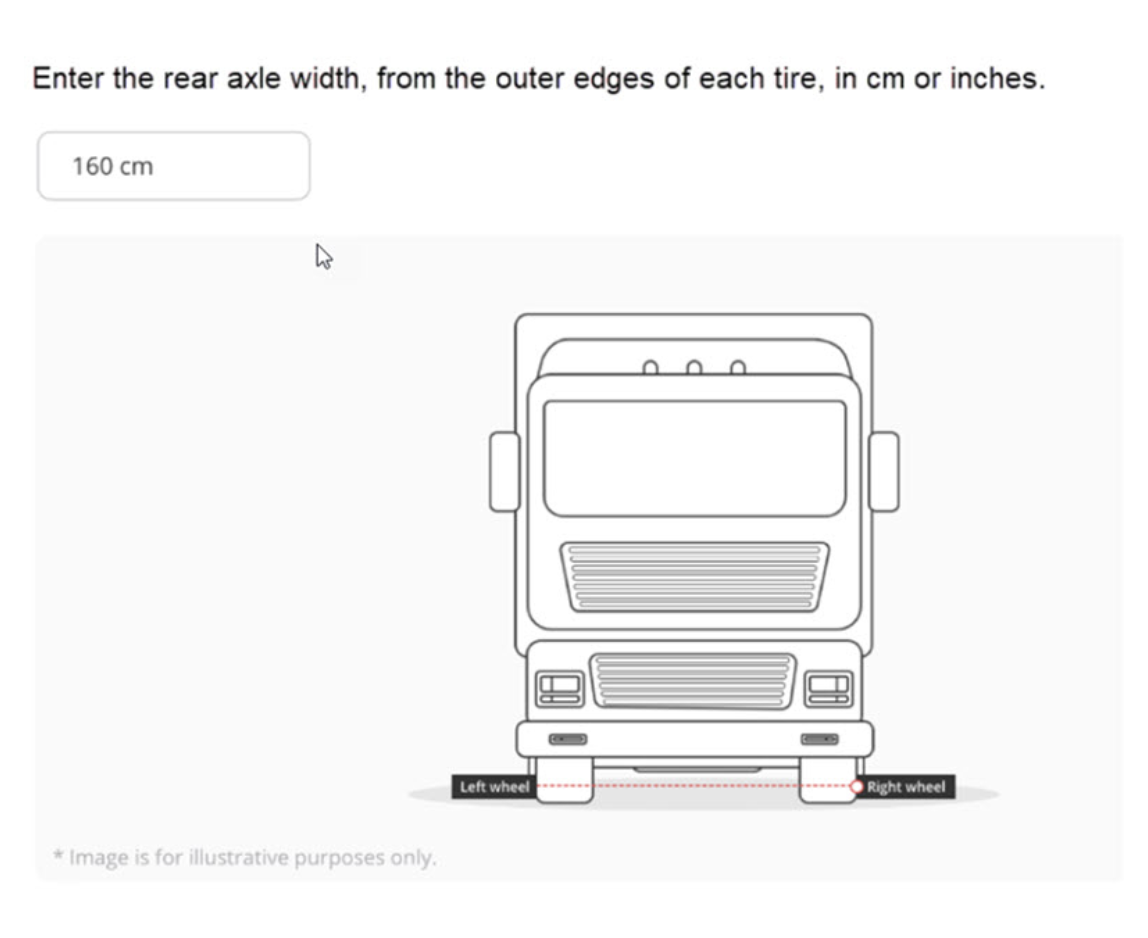
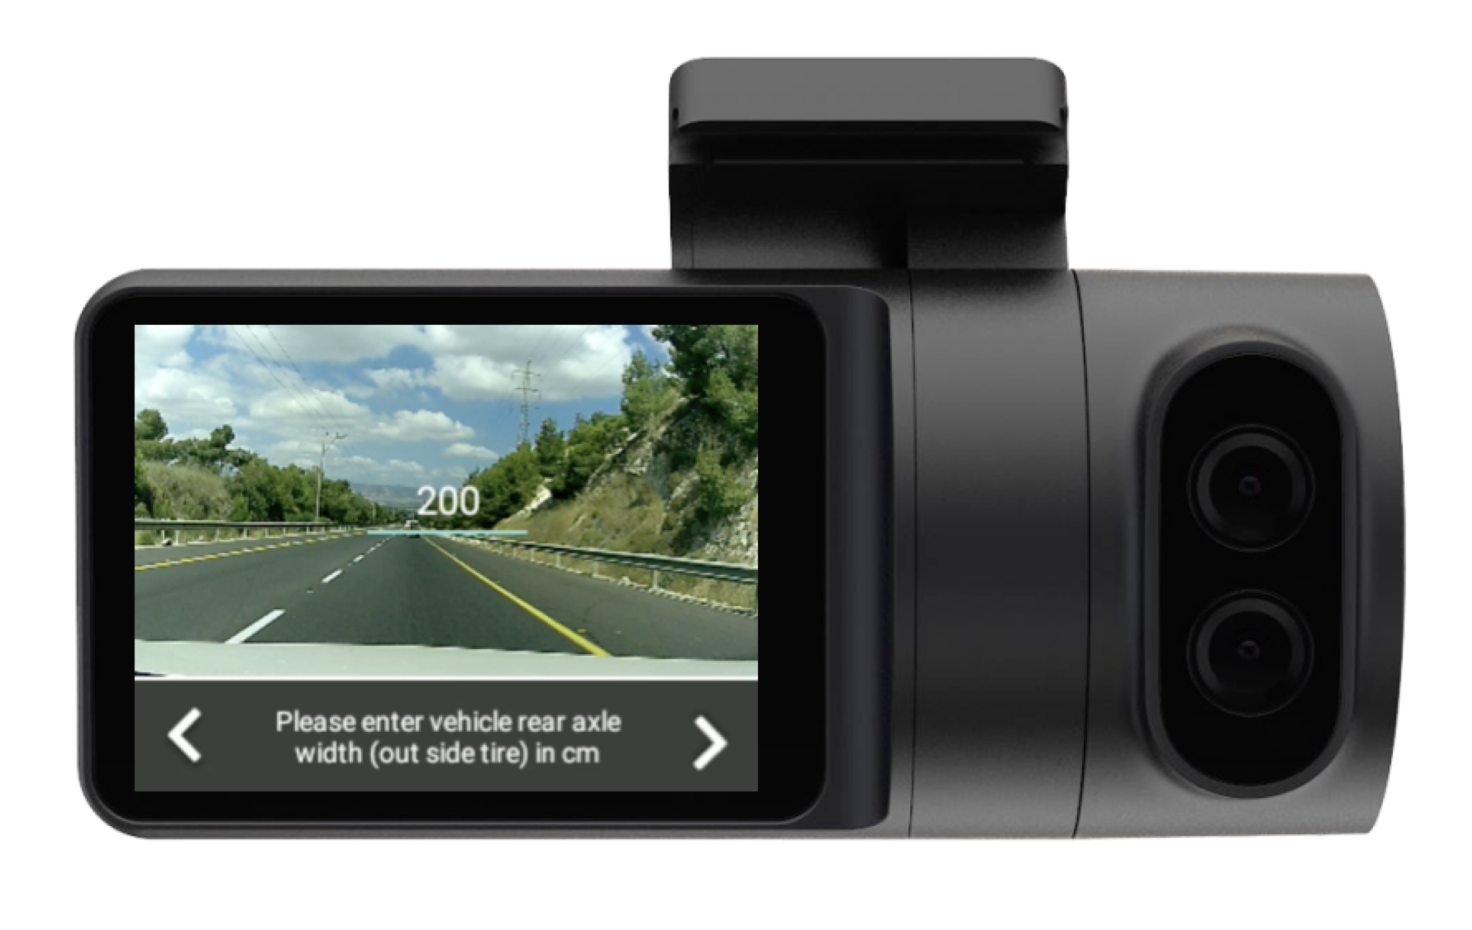
- Enter the rear axle width, from the outer edges of each tire.
|
Note: Enter the measurements in the units of measurement that are set for your safetycam. If your safetycam has the Speed setting set to:
These settings can be changed from the Settings menu of the camera. |
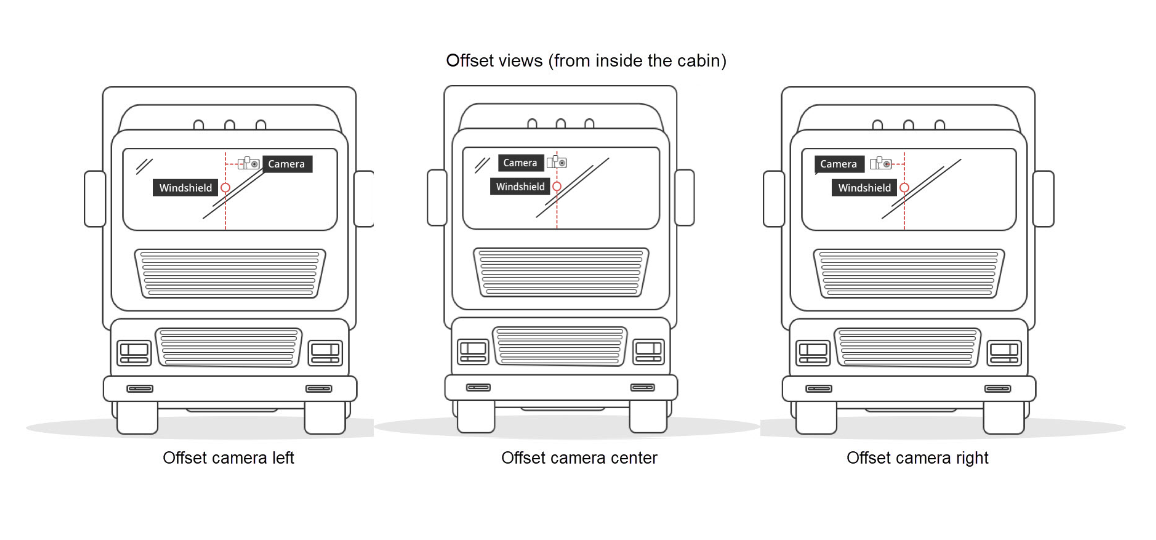
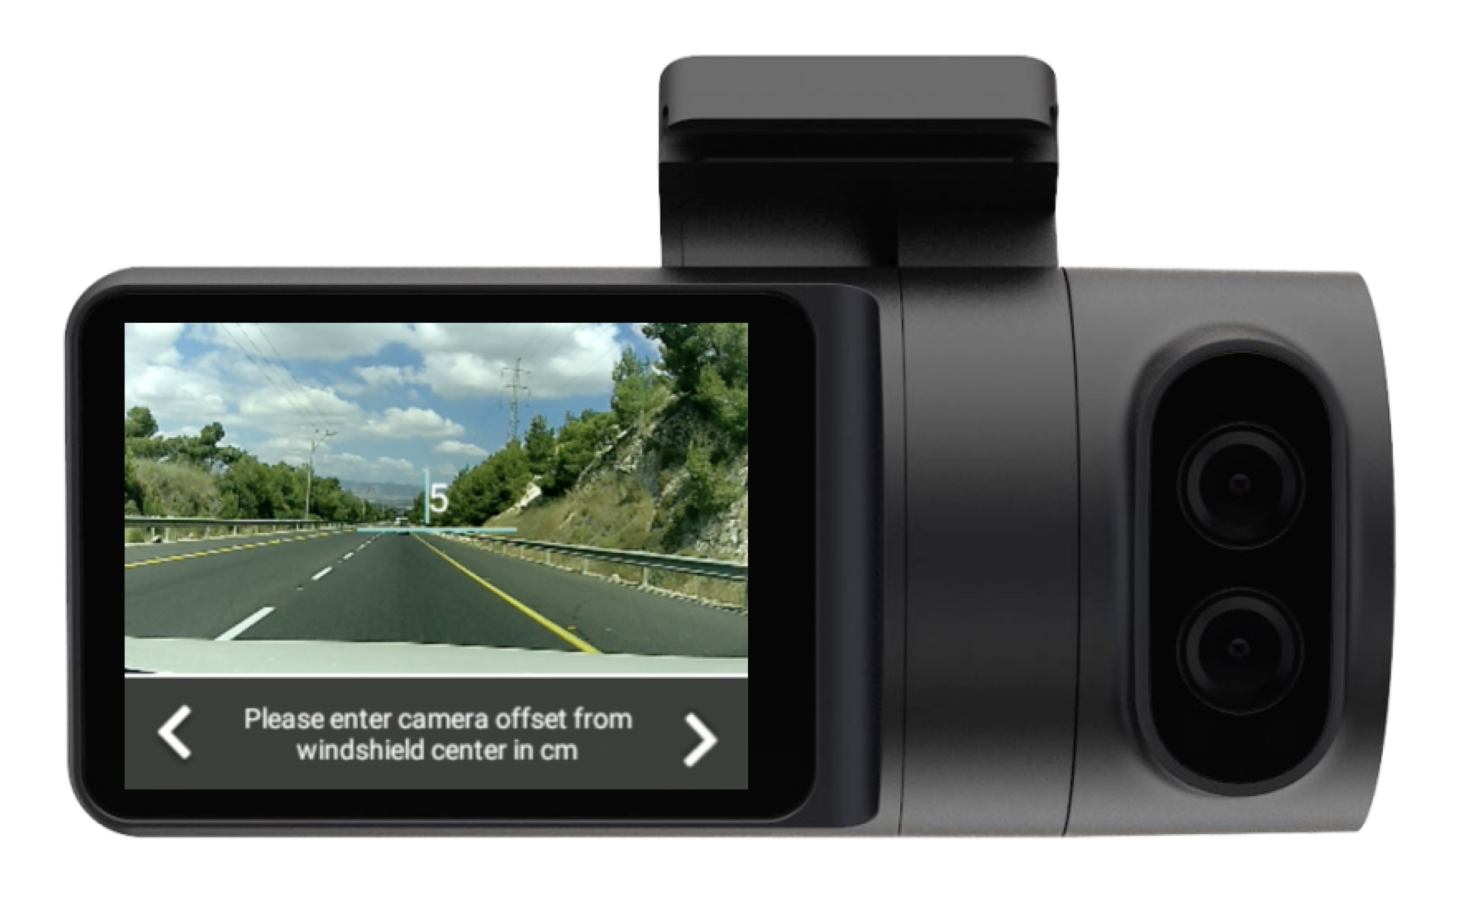
- Enter the camera offset, from the center of the windshield to the road-facing lens.
If the road-facing lens is to the right of the windshield center from inside the cabin, enter the measurement as a positive number. If the road-facing lens is to the left of the windshield center from inside the cabin, enter the measurement as a negative number.
|
Note: Enter the measurements in the units of measurement that are set for your safetycam. If your safetycam has the Speed setting, set to:
These settings can be changed from the Settings menu of the safetycam. |
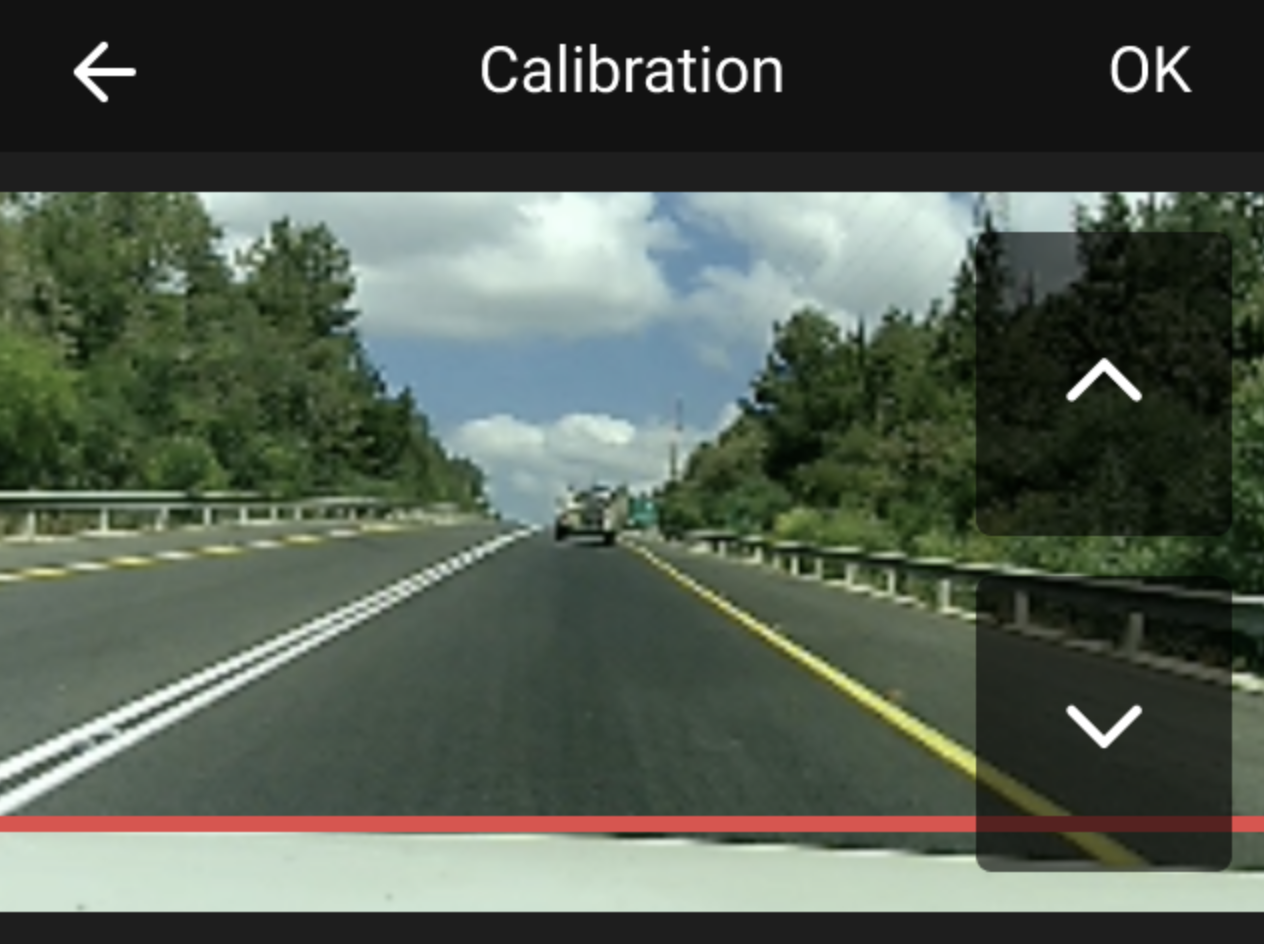
- Adjust the height of the red line to mark the highest point where the dashboard or vehicle front is visible. If no part of the vehicle is visible, lower the red line to the bottom of the image.
- Adjust the red rectangle to mark the edges of the left and right lanes.
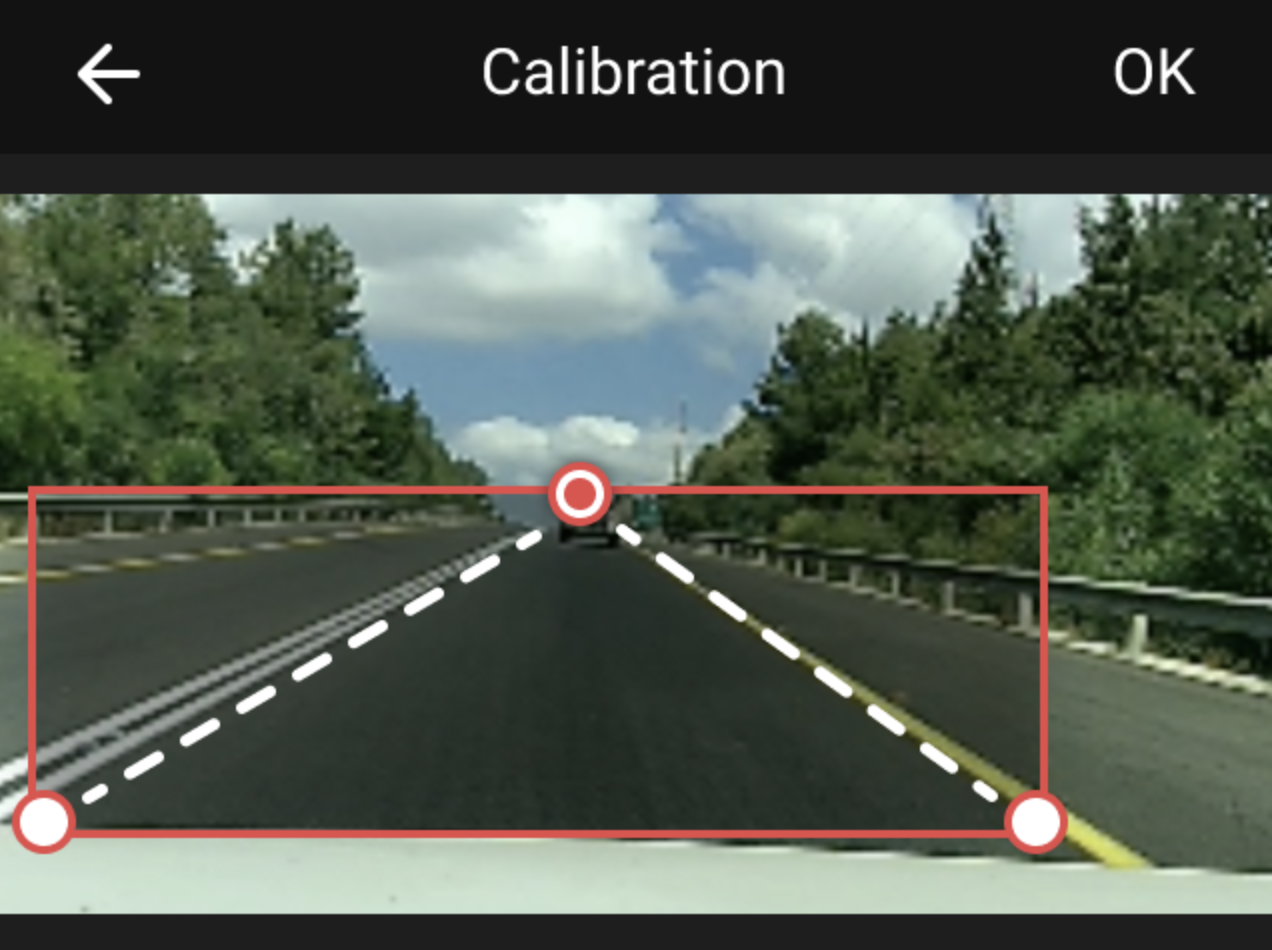
- Confirm the calibration layout.
- Once the calibration layout is confirmed, your safetycam calibrates. This can be seen in the Settings menu.
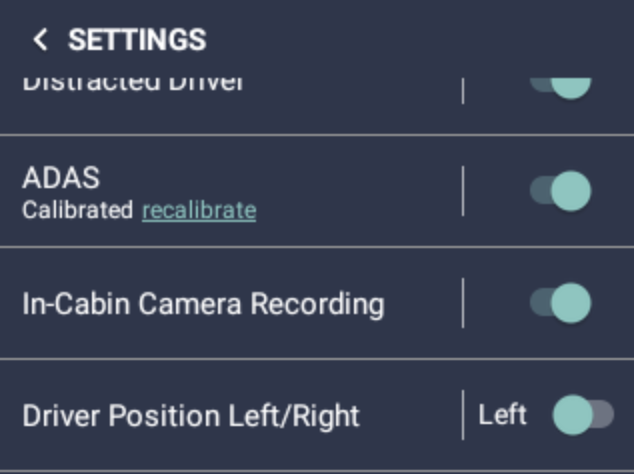
- To recalibrate, press recalibrate under ADAS in the safetycam settings, and begin from step 7 above.
PDF copy of the Instruction Manual for the ADAS Calibration: