
Hardwiring Azuga AI SafetyCam to Vehicle Fuse Box
Overview:
To utilize the full features of the AI SafetyCam, it must be connected to a constant 12V or 24V minimum 2A power source using the supplied cables. You can do this by hardwiring an AI safetycam to the fuse that has a constant power source.
This installation must be performed by a qualified or professional person. Working with your vehicle's power system can be dangerous. Consult a professional for guidance.
| Note: While in standby, you can retrieve recordings from the safetycam. In Standby mode, the safetycam draws a current of 32 mA. |
When you're ready, follow these steps:
- Get organized
- Hardwire the safetycam
Get organized:
To hardwire the camera to the fuse box, use the following equipment:

|
Note:
|
Locate your fuse box:
Check the owner's manual of the vehicle to find the fuse box, which may be located in different places depending on the vehicle model. Remove the plastic panel to access the fuse box. Open the fuse box by lifting a tab and pulling it toward you or with a trimming tool.
Which slot should I use?:
Use a circuit tester to test which fuse is constant. A fuse that is constant stays on when the car is off.
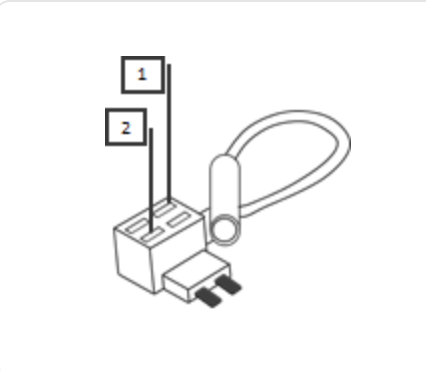
Add a fuse kit:
Use the add-a-fuse kit included in our hardwire installation kit for a more secure, long-lasting installation. The add-a-fuse kit provides a fuse slot for the existing circuit (#2 in picture below) and another fuse slot for the new circuit for the safetycam device (#1 in the picture below).
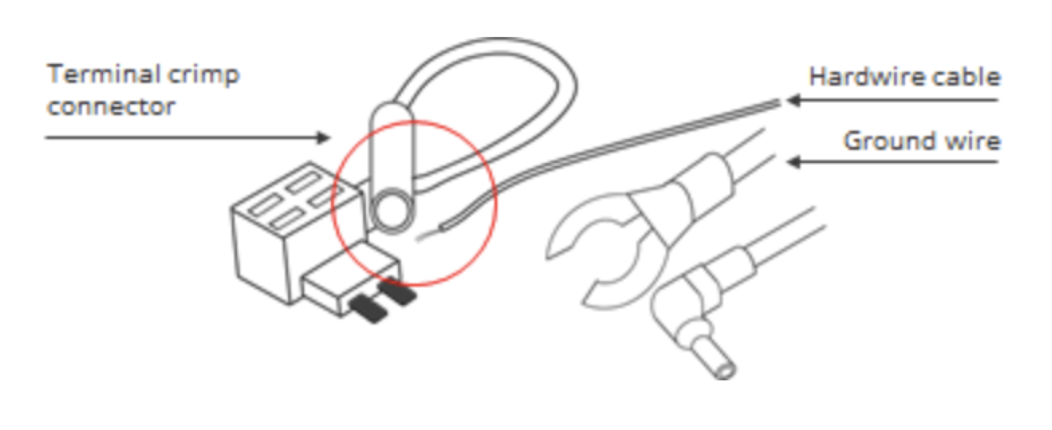
The ground wire:
The ground wire is usually in the shape of a ring or a C.
Hardwire the AI SafetyCam:
To hardwire the AI safetycam:
- Insert the new fuse tap that was provided in the installation kit into slot 1 of the add-a-fuse kit.
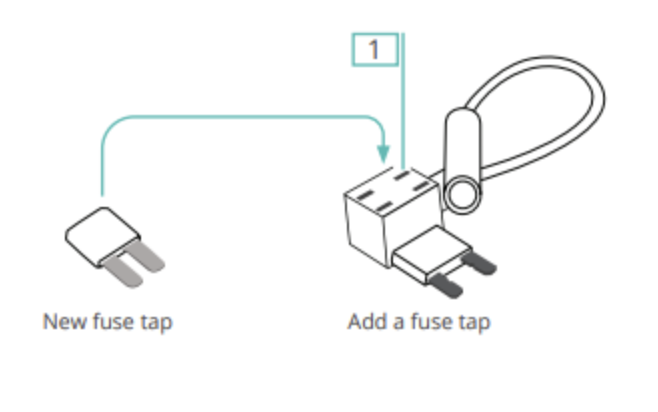
- Insert the fuse from the vehicle fuse box into slot 2.
| Note: If you insert them in the wrong order, the power will not feed through. |
- Trim off some of the rubber tubing to expose the wiring on your hard-wired cable.
- Using a standard needle-nose pliers, crimp the red wire (constant power) cable with the terminal crimp connector that was included in the add-a-fuse kit.
- Connect your add-a-fuse kit to the vehicle fuse slot you chose.
- Connect the ground wire (black) by slipping it under a metal bolt or screwing it into your vehicle. If needed, use a socket wrench set to loosen the bolt.
| Note: A loose ground wire can result in power issues for your safetycam. We recommend grounding your wire to an unpainted bare metal bolt. |
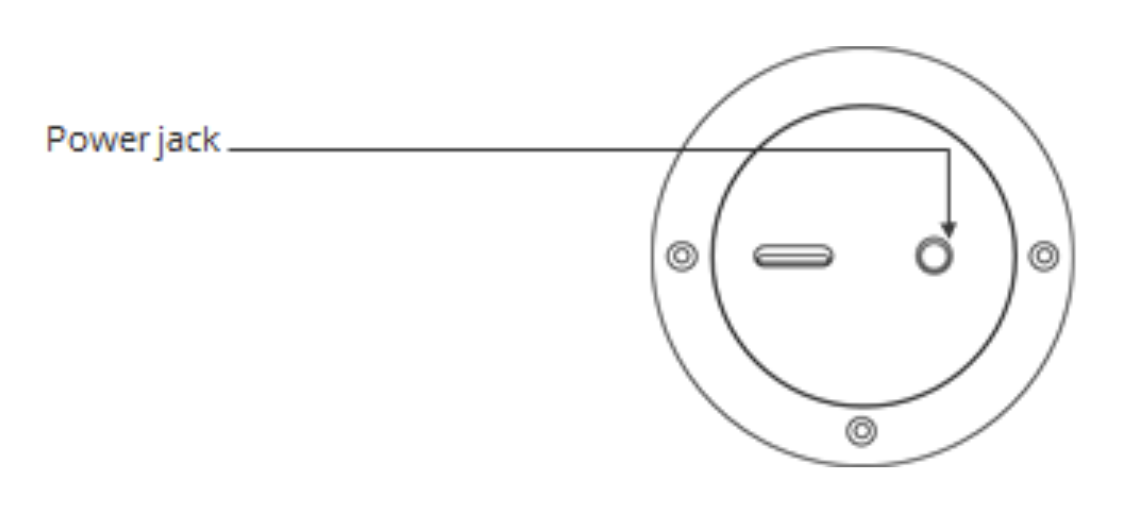
- Connect the power cable to the safetycam.
| Note: Once you've hardwired the power source, the safetycam starts up automatically every time the vehicle moves. |
- Start your vehicle to test the safetycam.
| Note: When a safetycam is in storage, the battery gets completely drained. Before using the safetycam, you need to charge it for an extended period of time, using at least a 2A power source before turning it on. |
- Once you have tested your safetycam, run the power cable along the headliner of the vehicle from the A-Pillar to the power source.
PDF copy of the Instruction Manual for the Hardwiring Azuga AI SafetyCam to Vehicle Fuse Box:
Instruction Manual | Hardwiring Azuga AI SafetyCam to Vehicle Fuse Box.pdf